This post contains affiliate links.
Having the right amount of fuel for your backpacking stove can make or break your camping experience. Pack too little and you’ll risk being hungry and not having enough energy to enjoy the great outdoors. Bring too much and you’ll be hauling extra weight which becomes a burden to your travels.
The amount of fuel you need for a backpacking trip will depend on your stove, the number of meals you plan to make and how much water each meal needs. The calculation I use is fuel needed to boil 2 cups of water multiplied by number of meals multiplied by a 25% safety margin. This will help you calculate the fuel you need for your backpacking trip
Below I share the details of how much fuel is required to boil and cook on common types of camp stoves and what factors affect boil and cook times. By the end, you’ll know how to achieve the perfect balance to ensure you won’t run out of fuel or be burdened with unnecessary weight in your pack.
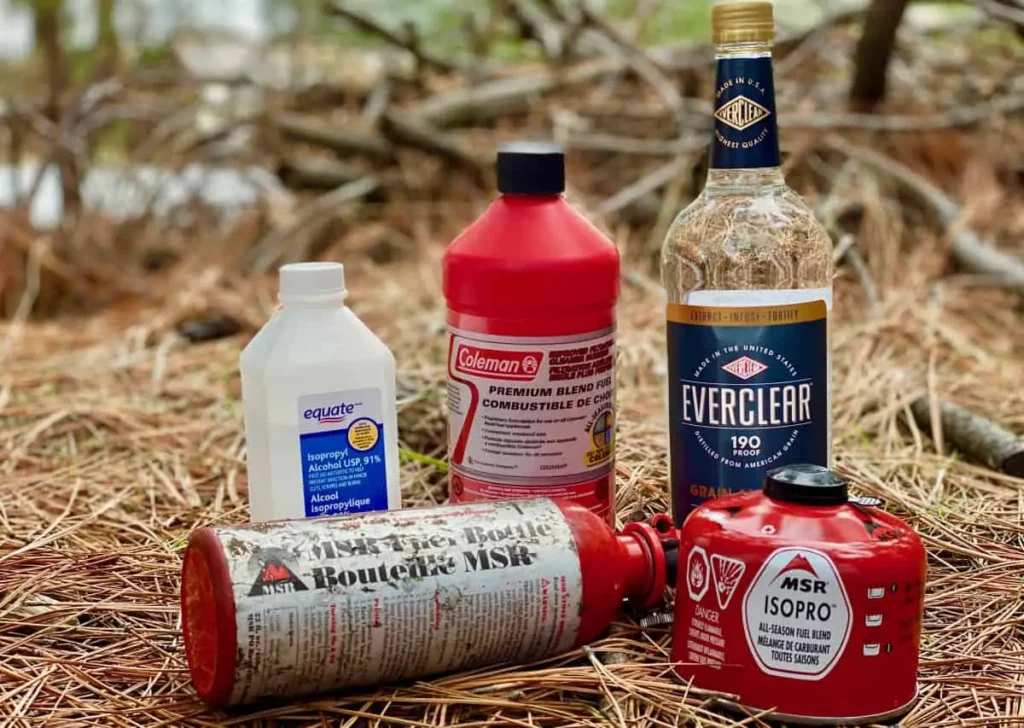
Table of Contents
How Much Fuel Do You Need?
If preparing your meals will only require boiling water then calculating the amount of fuel to bring on your trip is simple. Here’s what you’ll need to know:
- How much fuel your stove burns to boil a volume of water.
- The number of meals and hot drinks you plan to cook.
- How much water a meal requires.
My alcohol jet stove uses 1oz of fuel to boil 2 cups of water.
On a 3 day backpacking trip I usually plan on 6 hot meals (2 per day) and 3 hot drinks. Combined that makes 9 meals or 18 cups (4.25L) of water.
Most of my backpacking meals require boiling 2 cups of water. We also want to keep a 25% margin of safety to accommodate mild winds and cold.

1oz x 9 meals x 1.25 = 11.25 ounces of alcohol for the 3 day trip.
The MSR Pocket Rocket 2 will use 0.25oz of fuel to boil 2 cups of water.
0.25oz x 9 meals x 1.25 = 2.8 ounces of fuel.
In this case a single 4oz canister should provide enough fuel for a 3 day trip in 70F weather.
These calculations don’t take into account high winds, water temperatures or if your food requires simmering. It’s not uncommon to find that cooking in just a light wind could boost your fuel usage up 3 times higher.
How Much Fuel Will It Take For A Boil?
If you haven’t tested your stove out to find the amount of fuel it requires to boil water there are a few ways to find the data.
Reading the manufacturer’s specs on your stove should let you know the fuel burn for a boil. Manufacturers usually burn through many gallons of fuel while testing their designs so their data is pretty reliable.
Websites that sell stoves online often have reviews that include the results of other peoples experiences with their stoves. Theses types of reviews are great because they are typically tested both inside and outside which gives a good perspective of the differences. Getting the data from verified purchasers is always preferred.
Lastly, YouTube is full of camp stove reviews that give great perspective of a stove’s fuel burn in action. Not every stove will be reviewed on YouTube but there will probably be similar models to yours if you search long enough.
What Affects Camp Stove Cooking Time?
Wind
One of the biggest factors that affect your camp stove cooking time is the wind. The stronger the wind is, the less efficient your stove becomes at cooking. This is because the wind weakens the intensity of the heat that emanates from your cooking stove.
One of the biggest factors that affect your camp stove cooking time is the wind. The stronger the wind is, the less effective your stove becomes at cooking. This is because the wind disrupts the intensity of the heat that reaches your cookware.
This also makes the flames very unstable, which in extreme conditions, can blow out your stove completely. If this is the case, then you need to relight your stove which wastes more fuel making the process less efficient.
The wind blows away the heat from the flame and also draws the heat away from the sides of your pot or pan thus increasing your cooking time. However, you can avoid this from happening by using a low cost, lightweight windscreen to protect the flames from the wind.
No products found.
You can also place your stove near a natural wind block like rocks or downed trees to protect from the wind. Just make sure that you’re far enough away from any flammable items to avoid potential damage.
Outdoor Temperature
The outdoor temperature has a huge effect on your cooking time because it will reduce the baseline temperature of your water and pot. The lower the temperature is, the colder your food, water and cooking kit will start from. This will require more heat and fuel from your camp stove.
A cold temperature will require burning more fuel just to get the water to boil and effectively cook your meals. The surrounding temperature will absorb much of the heat coming from your camp stove and wick the warmer temperatures from the sides of your pot. This will cause your food to heat more slowly.
Another issue with cold temperatures is most directly related to gas canisters. As the gas cools it causes a pressure drop in the can. This creates a lower pressure differential between gas in the can and the atmosphere. The lower pressure in the canister produces a weaker flame as less fuel exits the can when the valve is opened.
A common solution to this issue is keeping your gas canister near your body or in your sleeping bag over night to keep it warm and prevent the pressure from dropping. Another option is to use an inverted canister stove which performs better than an upright in cold climates.
Most white gas bottles are manually pressurized negating this issue and making them more efficient than canister stoves in cold temperatures.
In hot temperatures your water will boil faster reducing your overall cooking time. Be sure to monitor your food more closely in hot weather because it will cook faster than you expect and become overcooked without warning.
Water Temperature
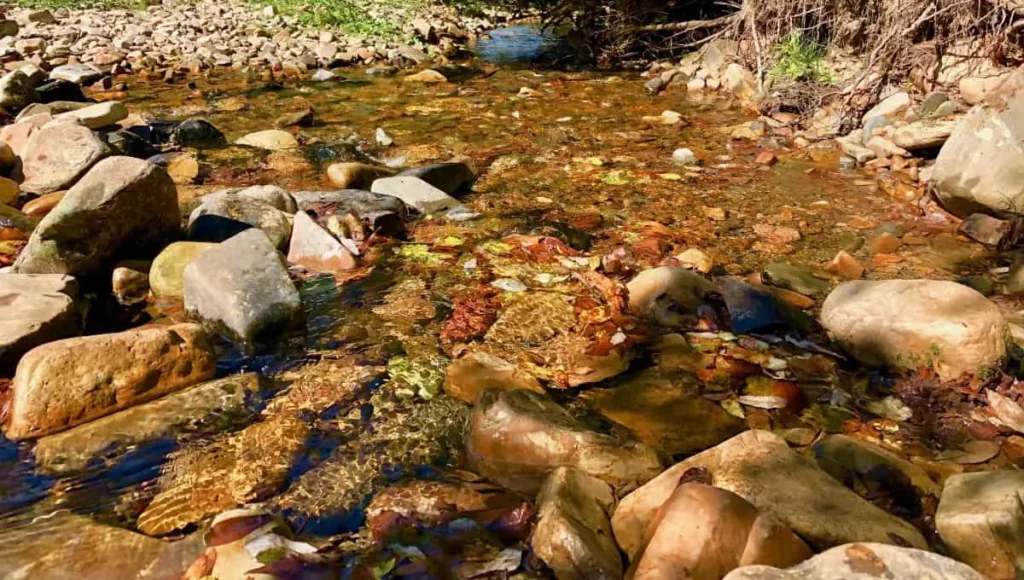
You’re most likely going to collect water from different sources. This can be either from the river, from snow, or some other water source. All these sources of water will vary in temperature and require different boil times.
A cold water source means you need to burn more fuel to bring it up to boiling temperature. This is especially true if you’re collecting snow around your area to generate water to cook your food or for drinking. As the snow melts you may also have to add more to the pot to get your desired amount of water needed for cooking. This will further increase the amount of burn time and camp stove fuel consumption.
River water is usually cold as well but warmer than snow. On the other hand water from a canteen or bottle is most likely heated up, especially if it’s carried close to your body throughout the day. Taking steps to pre-warm your water either with body heat or the sun will reduce how much fuel you need to use for cooking.
Food Selection
If you plan to cook meals from scratch it will take more fuel than rehydrating or needing a quick boil. This includes cooking raw food such as meat or freshly caught fish. Compare this to pre-cooked food which you just need to hydrate or simple mac and cheese. Your meal choices will determine your fuel needs.
Cooking from scratch means you’re going to cook 3 to 6 times longer. Turning the flame down to a simmer will reduce the amount of fuel used per minute but still consume more fuel over all.
There are some foods that absorb water more slowly than others. This includes pastas and long grain rice compared to couscous and minute rice. Also, using dehydrated backpacking foods may only require adding boiling water to the package and letting it absorb. These types of food only require a few minutes of camp stove usage to boil water rather than simmering your whole meal.
Eating a meal that requires cooking multiple items separately will also increase your fuel consumption because you’re essentially cooking twice. Choose your backpacking meals wisely to get the most calories with the shortest cook time.
Elevation
At higher elevations the oxygen content of the air is reduced causing less efficient combustion of your camp stove. This goes for canister, liquid white gas, alcohol and solid fuel stoves.
On the flip side, the boiling point of water decreases at higher elevations due to the drop in atmospheric pressure. As the pressure drops the water molecules have an easier time breaking their bonds and turning into steam. This creates a tradeoff between flame strength and boiling point.

However, you still need to consider that higher elevations tend to have colder temperatures and higher winds. Overall it’s wise to plan for extra fuel consumption when cooking in mountainous regions.
Ways To Increase Camp Stove Cooking Efficiency
- Use a windscreen around your stove to keep the wind from reducing your heat transfer and blowing your flame around.
- Keep a lid on your pot whenever boiling or cooking. If you need to stir your food while cooking keep it to a minimum.
- Size your pot to the style of cooking you’ll be doing. If your meals need 2 cups of water don’t boil 4 cups, it will only waste fuel.
- Have your food prepared ahead of time. Pre-chop all your fresh foods and have any packages open and prepared before the water boils.
What is the difference between burn time and boil time?
Boil Time
The amount of time it takes your camp stove to boil a specific amount of water. This isn’t necessarily a rolling boil but an initial boil to warm up your food or have a hot drink. An example of this is boiling 1 liter of water in 5 minutes.
In the tropics, it takes 2 to 3 minutes to boil a liter of water. It takes 7 to 10 minutes to boil a liter of water in a cold winter climate.
Burn Time
The amount of time your flame will last before it runs out of fuel. An example would be a 60 minute burn time to empty a full 8 oz (227g) canister.
You can also dial down your stove’s fuel valve to a simmer to reduce the flame size and fuel usage. This will extend your burn time but also your boil time. A common strategy is to bring your food to a boil on high then reduce your flame size to maintain a simmer. This is ideal for meals that need to be slowly cooked such as meats, rice and pasta.
Boil Time For Different Stove Types

Integrated Canister Stoves
The average boil for an integrated canister stove is around 2 minutes for 2 cups (0.5L) of water. However, there are models that boil even faster, approximately 1.5 minutes.
Stoves that have an integrated pot system such as the MSR Reactor Stove or the Jetboil MicroMo are able to boil water in record time while also reducing the fuel usage in the process. According to the companies these can boil a half liter of water between 1 and 2 minutes and 10 to 12 liters from a 100g fuel tank.
You can see our reviews on the Jetboil stove systems and the MSR stove systems.
They reach these amazing stats because they are designed to have no space between the stove flame and the bottom of the pot on top. This method transfers the heat from the flame extremely efficiently.
No products found.
Integrated gas stoves are what you need if you’re going to a place that is windy, such as mountain regions and open plains. They also operate well in colder climates and are highly recommended if you tackle bigger trips and want to eat meals fast.
However, these aren’t great if you want to simmer food or cook for a group. They are best suited to prepackaged meals and dehydrated foods that require minimal cook time or are “just add boiling water” meals.
Upright and Remote Canister Stoves
Upright and Remote canister stoves take a bit longer to cook, averaging a time of 3 to 5 minutes to boil a liter of water. This is because they are more susceptible to wind and outside air temperature and therefore less efficient at transferring heat from the stove to the pot.
Using a wind shield will assist in improving the efficiency however many manufacturers don’t recommend doing so because there is a risk of overheating the gas canister. Monitor the temperature of the fuel canister or bottle if you use a wind shield to ensure it does not overheat or it may explode.
Canister stoves like the SOTO WindMaster can get an average of 60-75 minutes of burn time on an 8oz (227g) canister. This equates to an average of 12-16 liters of water boiled from a single canister. Of course these numbers will vary with outdoor conditions.
Many backpackers and campers choose this style of stove because they are low cost and simple to operate. Canister stoves are lightweight as well, usually weighing around 2 ounces excluding the fuel canister.
Canister stoves also fit different sized camping pots and pans and provide very good heat control for different styles of cooking. This type of stove works really well for meals which need longer simmering times or if you want to cook for a group.
No products found.
Solid Fuel Stoves
Depending on the stove design, solid fuel stoves can often burn fuel tablets, small sticks, leaves, pine cones, gels or even alcohol (I know it’s not a solid). If you choose to burn local wood it’s always a good idea to bring a few tablets along because wet conditions will put a damper on your cooking otherwise.
Boiling time for 2 cups (0.5L) of water is around 8 to 10 minutes for most ESBIT fuel tablet stoves which is the effective burn time of a single tablet. Though they can burn up to 14 minutes the flame strength diminishes a few minutes before burnout.
Esbit tablet stoves like this ultralight folding titanium stove are also very simple to light and cook on. Some backpackers recommend using a Vaseline soaked cotton ball or a bit of hand sanitizer to help get the tablets lit but a lighter or match will usually do the trick on their own. These tablets have been known to produce an odor and leave a film on the bottom of cookware when burning.

- Simple, Stable, and Reliable Camp Stove For Outdoors and Emergencies: Small camping stove is suitable for accommodating camping cookware...
- Compact, Collapsible Design: A survival gear and equipment must-have, this unbeatably small backpacking stove folds down to a compact...
- Durable Construction: Mini stove is constructed from ultralight titanium; Makes an ideal addition to any emergency, camping or backpacking...
Alcohol Stoves
Alcohol stoves come in many different designs but are a very simple method of cooking while backpacking or trail hiking. The great thing about alcohol stoves like the REDCAMP Mini Alcohol Stove is that they are extremely lightweight and have very few parts to break or damage.
Traditionally alcohol stoves can burn ethanol (red HEET), methanol (Yellow HEET), grain alcohol (Everclear), or 91% Isopropyl alcohol. Each burns a little differently but in good conditions, 1oz (30ml) of alcohol will boil 2 cups (0.5L) of water in 5 minutes.
You can find out more about the advantages of different alcohol stove designs in our Complete Guide To Alcohol Stoves.
No products found.
How Much Fuel Is Left In My Canister?
Unfortunately, giving your old fuel canisters a shake to determine the amount of fuel remaining inside them will probably leave you hungry in the bush. On the other hand, keeping a pile of half empty canisters in the corner of your garage isn’t a good strategy either.
Here are a few ways to determine how much fuel is left inside your old iso-butane canisters.
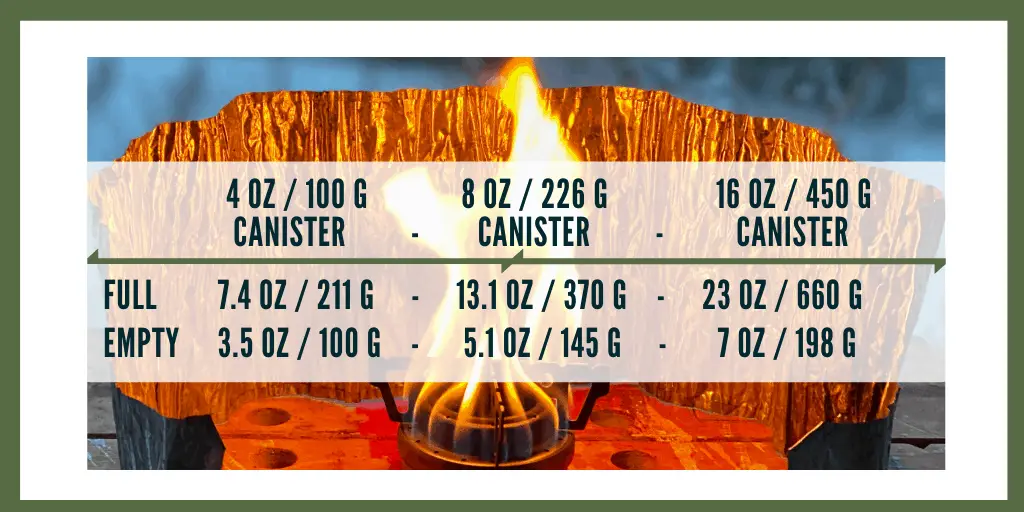
The Weight Method
If you’re at home and have a scale handy using a digital scale to weigh your fuel canisters will give you a good gauge of the amount of fuel left inside. A digital scale tends to work best for this because it can measure grams quite accurately.
If you have a full and an empty canister of your preferred brand to weigh you can subtract the weight of the empty canister from the weight of the full fuel canister to find the grams of fuel remaining inside. Otherwise, above is a rule of thumb for the 3 main sizes of stove fuel canisters.
The Float Method
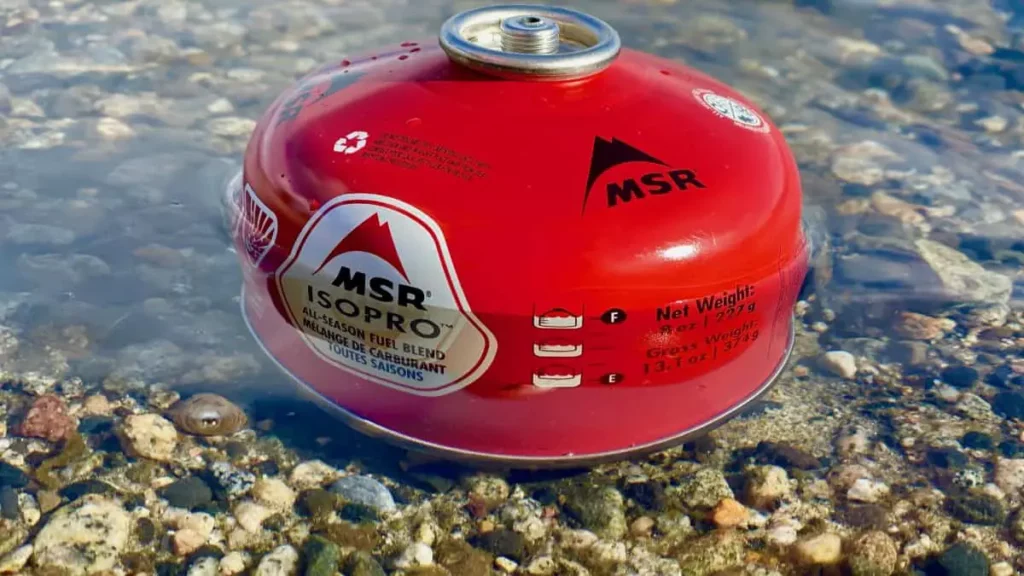
Backpacking stove fuel canisters float in water and the amount of canister remaining above the waterline is related to how much fuel is inside. A canister with more fuel is heavier and for that reason it will sink further into the water than a canister that has been used.
Using a pot of water or a calm area in a river or lake, place your full canister in the water and mark off the waterline on the side of it. As you use your stove you can repeat the process to gage the remaining fuel in your canister.
If the waterline on your fuel canister is halfway between your full and empty lines then it is half full. Similarly if it is a quarter of the way down from the full line then your still have three quarters remaining inside.
Similar to the weight method, it’s handy to have an empty fuel canister around to mark off the waterline on the side before your trip. This line can then be transferred to new canisters for making quick checks in the bush. Just be sure there is no air trapped under the canister bottom, this will make it float higher in the water.
To make this method easier some manufacturers like MSR have the waterline levels marked on the side of their canisters already.
The Timing Method
This method is probably the least accurate but requires the most effort. It’s usually used as a secondary method for those hard core backpackers tracking their burn time stats and efficiencies.
Using a marker track the amount of time your stove was running and subtract it from the manufacturer’s burn time. This will of course vary if you adjust the valve while cooking but after burning through a few canisters you’ll learn how to get the best efficiency from your fuel and claim the bragging rights.
Final Thoughts
Calculating how much fuel you need to bring on your backpacking trip is a simple formula but will differ for every stove and cooking style. Knowing your numbers will help reduce the fuel weight and make room for extra gear in you backpack.
To make sure you don’t run out of fuel on your trip:
- Test your stove out in different weather conditions before the trip
- Choose quick cooking meals
- Size your pot to your cooking needs
- Keep the lid on your pot while cooking
- Shield your stove from the wind
- Have your food and drinks prepared before reaching a boil
")