This post contains affiliate links.
After a night of camping, breathing fresh unpolluted air, gazing at the millions of stars above you, sleeping on the cold, hard ground and waking up with the bright light of dawn, you will be ready for a hot, delicious cup of coffee. But without access to your electric coffeemaker how are you going to achieve a decent cup of coffee?
So, how do you make campfire coffee? There are several methods for making campfire coffee while camping including cowboy coffee, percolated coffee, french pressed coffee, homemade camping coffee bags, and Aeropress coffee.
Each of these methods requires some basic tools and some need prep work at home. Here, I’ll be showing you how to make campfire coffee with step-by-step instructions, along with some tips to help you make the best cup of coffee while camping.
Of course, all methods require you to heat some water. You can do this over the fire or with your camp stove. If you are still trying to find the perfect camp stove check out our article The Best Camping Stove or if you want one more suited to backpacking then read The Best Stove for Backpacking.
Table of Contents
Tips for Making the Perfect Camping Coffee
I’ll start with some to make great camping coffee. These tips can be used with any of the 5 methods listed below. If you’d prefer to jump ahead because you know all the tips and tricks for making delicious coffee then click here to get to the methods.
Water Temperature
The temperature of the water you use to make coffee is important because this is what determines the quality of your coffee. The higher the temperature of the water the more bitter your coffee will be.
This happens because more elements of the coffee are absorbed into the water, hence, the more bitter taste. The ideal temperature to brew coffee around 200 degrees Fahrenheit.
Since water boils around 212 degrees Fahrenheit, you want to remove the boiling water from the heat source for around 30 seconds to 1 minute to bring the temperature down a bit.
Percolating is the only method where you’re going to boil the water needed to make the coffee. This is the reason why percolated coffee can be bitterer than the other types of coffee that are made using a different method.
If you need help with how to boil water while camping, check out my detailed article on boiling water while camping.
Strength
A coffee’s strength is determined by two variables. The amount of coffee grounds you use, and the time you let the coffee brew.
Expose to water for longer and you’ll have stronger tasting coffee. Expose it for a shorter amount of time and you’re going to have a lighter or weaker coffee taste. This is why there’s no such thing as the “perfect” brewing time for a cup of coffee because it depends on your personal preferences.
I suggest you use 2 tablespoons of ground coffee for every 8 ounces of water. But don’t feel restricted with this because you have free reign on the amount you want. Experiment with how much coffee you use and how long to brew it to find your sweet spot.
Grind
Grind consistency is another important consideration but also depends on the method of brewing you are using. The finer your coffee grounds are, the more exposure it will have to the water. This will then make your coffee darker and stronger but if overground could make your coffee bitter too. If your coffee is too coarse it will be weak and have less flavor.
If you are using a method with a paper filter then a medium-fine grind is best. Meanwhile, coarse coffee grounds are better if you’re going to use a strainer, such as in the case of French Press and percolated coffee.
Brand
Then there’s the brand factor. This entirely depends on you, but it’s best that you settle for known brands, of course, as long as they stay within your budget. If you want to get the best coffee experience in camping, then expect to spend more, such as with the Arbuckles’ Ariosa Coffee.
Arbuckles’ has been around for more than a century and actually started the trade of selling roasted coffee beans. Prior to their innovation, the only method of roasting coffee back then was in a skillet on top of a wood stove. Obviously, this was a very inconsistent method.
Whatever brand you choose from inexpensive Maxwell House to pricier Arbuckles’ just get one you know you enjoy the taste of so that will be one less factor to affect your camp coffee experience.
Different Ways of Making Campfire Coffee
Here are the top 5 ways I have found to make coffee while camping. All are pretty straight forward but do need specialized equipment or prep ahead of time.
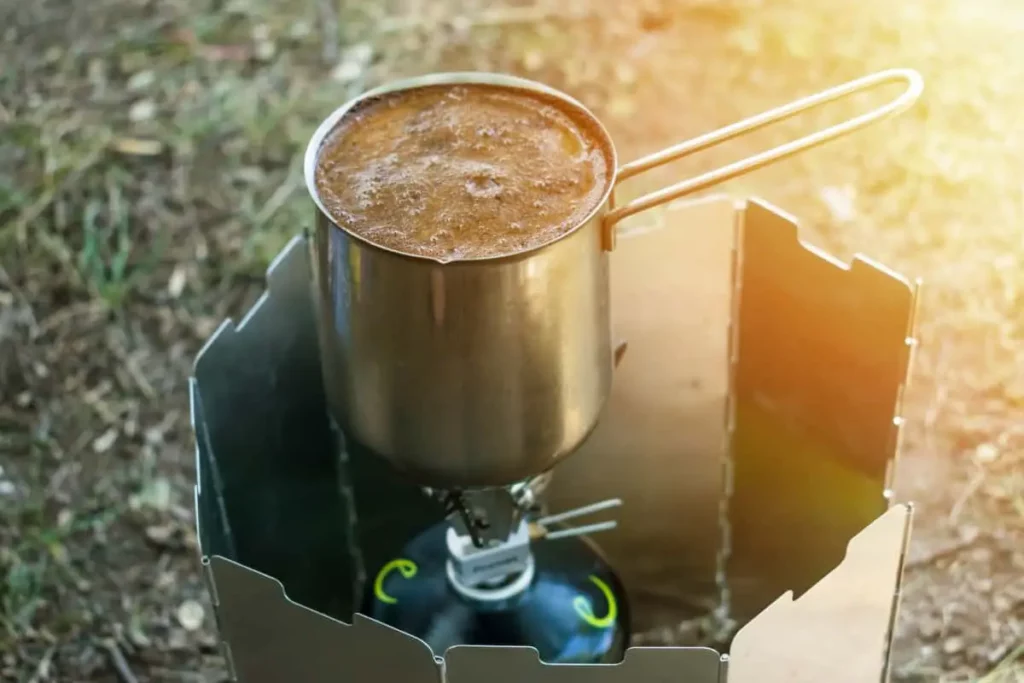
Cowboy Coffee
Cowboy coffee is one of the most popular, simplest and oldest methods of making coffee. It combines four basic elements of all coffee making: ground coffee, water, a pot, and heat – from a campfire, a grill, or a camp stove.
Equipment Needed For Cowboy Coffee
- Pot or coffee pot (link to Amazon)
- Fine Ground Coffee
- Water
- Heat source – stove, campfire, or grill.
How to make cowboy coffee?
Step #1
Add the amount of water you need to your pot, approximately 8oz per cup of coffee which will fill a standard mug about ¾ full. Bring to a boil it over your heat source. This can either be on a campfire, stove, or grill. Just make sure that the flames aren’t too big if you’re boiling the water on a campfire so you can safely remove the pot when ready.
If you’re at a higher elevation or it’s cold out it’ll take longer than normal for the water to boil.
Step #2
Once boiled, remove the pot from your heat source and place it on the ground for a minute to cool. You want your water to have a temperature of around 200 degrees Fahrenheit before you start making your coffee.
Step #3
Add 2 tablespoons of fine ground coffee to your pot for every 8oz. water. Then gently stir the grounds inside the water.
Step #4
Let the pot sit for about 2 minutes then stir again. Let sit for another 2 minutes.
Step #5
After brewing for a total of 4 minutes (you can let it brew longer if you like stronger coffee but too long will make it bitter) sprinkle or slowly pour some cold water on top of the coffee grounds. You do this to help the ground settle to the bottom.
Pouring the water around the edges and down the spout (if you have one) helps prevent grounds from ending up in your cup when you pour yourself some coffee. You’ll add about ½-1 cup of cold water depending on how big of a pot you made.
Step #6
Now you can gently pour the freshly made coffee out of the pot so that the ground will stay at the bottom and not in your cup.
French Press Coffee
Next is the french press method, which isn’t just popular in camping, but in general coffee making as well. This has been the go-to-choice of campers because simple and many already have the equipment. Keep in mind most home use french presses are glass so when taking yours camping be careful or invest in a metal one.
The French press method is similar to making cowboy coffee but the ground is instead pressed against the filter disc’s bottom using a plunger. This lets you easily and confidently pour your coffee without grounds.
Equipment Needed for French Press Coffee
- French Press coffee maker (link to Amazon)
- Water
- Pot
- Coarse ground coffee
- Heat source – stove, campfire, or grill.
How to make French Press coffee?
Step #1
Start by boiling water in a pot. Pour 2 to 3 ounces of water into the French press cylinder and gently swirl it around the container. Then return the swirled water into the pot. This warms up the container. Once the water has boiled let cool for about 1 minute.
Step #2
Place 2 tablespoons of coarse ground coffee into the French press cylinder for every 8oz. of water.
Step #3
Add desired amount of water to the cylinder in a swirling motion. Place the lid with plunger onto the cylinder. The plunger should be just touching the grounds.
Step #4
Let the coffee steep for around 4 to 5 minutes then gently press the plunger to the bottom of the cylinder. The coffee is ready! Gently pour the freshly made French pressed coffee into your mug.
Percolated Coffee
Making coffee in a percolator is another popular coffee making method when out camping. And though it might take you a bit longer compared to if you were just to follow the drip coffee making method, it’s still totally worth it because it’s simpler knowing that you don’t need any paper filter. It’s basically continuously boiling the brew until the required strength has been reached.

Equipment Needed for Percolated Coffee
- Coffee percolator with a strainer, stem, and bulb (link to Amazon)
- Water
- Coarse ground coffee
- Heat source – stove, campfire, or grill.
How to make percolated coffee?
Step #1
Fill the percolator pot with water, add enough for however many cups your need but should be below the strainer basket’s bottom part. Then slowly place the strainer on the pot’s stem. You want it to be firmly placed on it so that it won’t slide. Add 2 tablespoons per 8 oz of water of coarse ground coffee into the basket strainer.
Step #2
Place the cover on top of the basket strainer and close the lid on the percolator pot. Adjust the heat and wait for the water to boil.
Step #3
Once the water starts boiling, lower the heat or carefully move the percolator to the fire’s edge. The coffee should percolate for about 5 minutes. You should be able to see the coffee bubbling up in the sight glass on top of the percolator.
If you like very strong coffee let it percolate a bit longer, weaker coffee should take less time. Once the desired strength is reached take the percolator off the heat and pour yourself a cup to enjoy.
Homemade Camping Coffee Bags
Coffee bags are very similar to Cowboy Coffee, but they are just much easier to make. This is one of the most popular methods of making campfire coffee because the process is very simple. And you don’t have to waste a lot of coffee grounds!
Equipment Needed for Camping Coffee Bags
- Cotton twine or dental floss (unflavored)
- 4 to 5 pcs. of paper coffee filters
- Medium-fine ground coffee
- Water
- Pot
- Heat source – stove, campfire, or grill
How to make bagged camping coffee?
Step #1
Cut around 8 inches of dental floss or cotton twine. You need to have one for every coffee bag that you’ll make.
Step #2
Get a drip coffee filter and lay it flat on your table. Scoop 2 tablespoons of coffee directly into the filter’s center for every 8-ounce that you are planning to make. I recommend that each bag should make around 16oz., which is equivalent to 4 tablespoons of ground coffee.
If you plan on making a big batch of coffee then use multiple bags, otherwise, if you put too much coffee into the filter you’ll have trouble closing it in step 3.
Step #3
Collect the filter sides and bring into the center, twist the top of the pouch then use the dental floss or string to neatly tie the pouch’s top. Make sure to tie the pouch tightly so no grounds can escape and leave a long tail so you can easily remove the coffee bag from the pot
Step #4
Add the desired amount of water to your pot and bring water to a boil. Once boiled remove the pot from heat and let stand 1 minute. Then submerge the required number of coffee bags into the pot, keeping hold of the string tails. Remember if you followed my tip above you need 1 bag for every 16oz (2 cups) of water.
Step #5
Continuously jostle the bag in the water for around 5 minutes. You can stretch this out to 7 minutes if you want a stronger coffee blend. Then slowly remove the coffee bag from the pot and pour yourself a fresh cup of warm coffee.
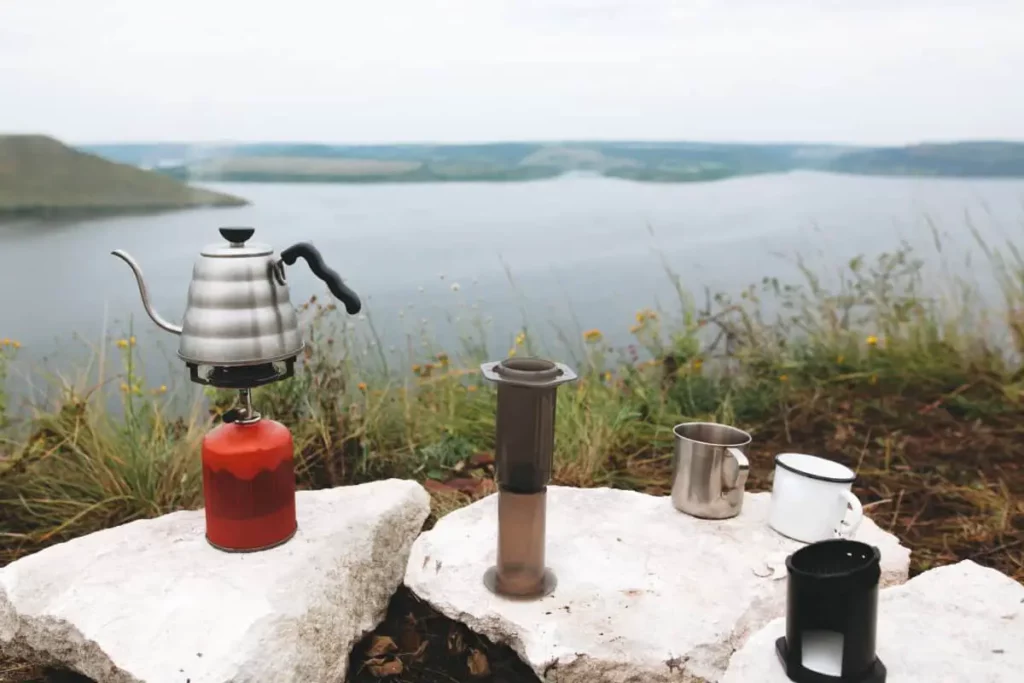
AeroPress Camping Coffee
The Aeropress is a relatively new innovation. It came to the market in 2005 and will be around for the long haul. The Aeropress uses a plunger to force the water through the coffee producing an espresso like coffee. This is my favorite way to make coffee at home or in the woods.
A minor downfall is the AeroPress only makes one cup at a time but they are pretty quick to make. There are also several parts to the AeroPress but they are easy to keep together.
Equipment Needed for AeroPress Coffee
- AeroPress (link to Amazon)
- AeroPress paper filters or reusable filter (link to Amazon)
- Medium-fine ground coffee
- Water
- Pot
- Heat source – stove, campfire, or grill
How to make AeroPress camping coffee?
Step 1
Add the desired amount of water to your pot and bring water to a boil. Once boiled remove the pot from heat and let stand 1 minute.
Step 2
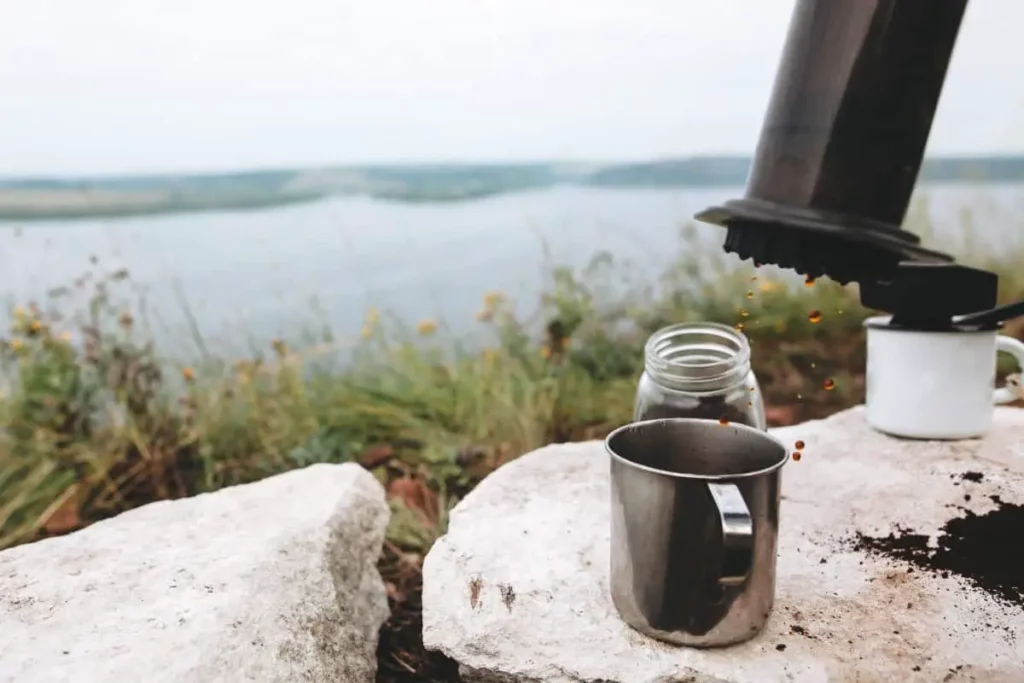
While the water is boiling prep the AeroPress. Place a paper filter in the bottom cap of the AeroPress, screw the bottom cap on to the body. Then add one scoop of coffee and gently shake to even it out. Place Aeropress on top of your mug ensuring your mug is also placed on a stable surface.
Step 3
Pour slightly cooled boiling into the AeroPress cylinder and fill just about the #2. Stir the coffee and water for 10-15 seconds.
Step 4
Insert the rubber plunger into the Aeropress cylinder and apply gentle downward pressure. It should take about 30 seconds to fully depress the plunger. It may seem difficult at first but keep applying consistent pressure to the plunger to force the water threw the coffee grounds.
Step 5
Remove the AeroPress from the mug and top up the mug with hot water till your cup is full. Unscrew the bottom cap from the Aeropress and over a garbage bag finish depressing the plunger to eject the used coffee grounds.
What is the best coffee-making method for backpackers?
The coffee bag method is the best method of making coffee for backpackers because of its simplicity. You don’t need to bring any heavy or bulky equipment such as with French Press or percolated coffee.
You simply need your coffee bags and a pot with you. To make things simpler you can easily make your coffee bags ahead of time at home before heading out on your trip. Once you’re done making them up, you can then just place it in your bag and save it for later.
What is the best method for camping in groups?
The Cowboy Coffee method is your best bet if you’re camping in groups because if you have a big enough coffee pot this makes quality coffee in huge volumes in an easy and convenient way.
If you find the idea of cowboy coffee a little daunting don’t worry a little practice will help you get the hang of getting those coffee grounds to sink to the ground. If you’d rather not learn a new method or have a fear of coffee grounds in your coffee then the coffee bag method is the next best option.
The coffee bag method will let you make a large pot of coffee relatively easily. You will just need to make up a lot more coffee bags. But if your camping with a large group enlist some help to get the bags made up quickly while the water is boiling.