This post contains affiliate links.
If soft spots develop on the roof of your motorhome or trailer it’s likely that water leaks are occurring and probably causing the wooden structure of your RV roof to rot. Performing regular roof inspections and replacing any cracked or damaged sealant is the best way to avoid costly repair bills.
A soft spot on an RV roof is a major problem and is typically a sign of dry rot or a defect in the roof. If moisture enters and remains in the roof structure, roof rot will start, and soft spots will develop. Recognising signs of a leak and fixing the problem quickly is the best way to prevent soft spots.
Repairing a soft spot on an RV roof is a big job which can require removing the damaged part of the roof and replacing roof trusses, plywood sheathing, and roofing material. If you identify and remedy the issues early the fix may be nothing more than a bit of sealant.
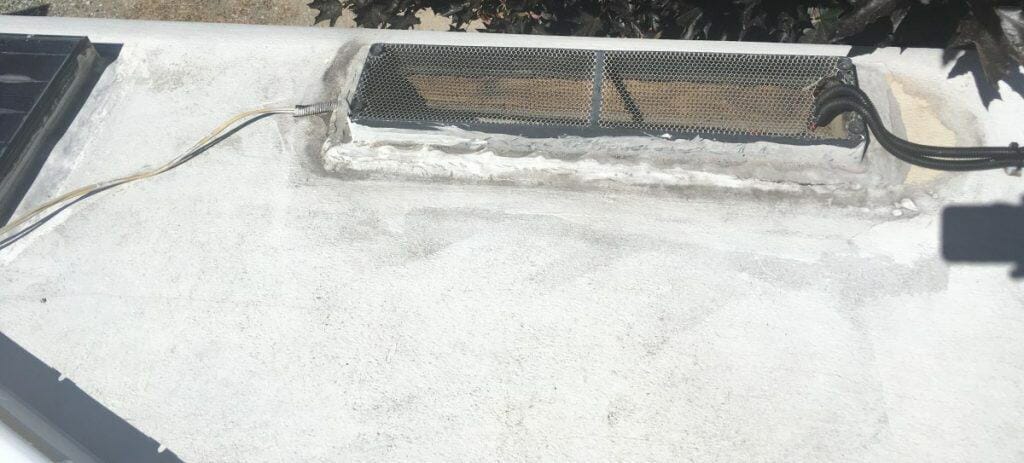
Table of Contents
A Soft Spot On An RV Roof Is A Major Problem
Depending on the material used, RV roofs are generally designed to last up to 20 years before they need to be replaced. The conditions they operate in or are stored under will affect this timeframe.
A soft spot on an RV roof is generally a sign that the RV roof leaked, and water accumulated inside and wasn’t thoroughly dried out. This will cause wood rot, possibly mold, and compromise the roof’s integrity.
Leaks can happen on the roof of your motorhome or trailer anywhere and at any time, and there are many possible causes. A tree branch could scrape the roof membrane, or the roof sealant may have hardened, cracked, or shrunk.
How Often Should I Inspect My RV Roof
Roof inspections should be performed at the beginning and end of each season. Doing it at least two times a year will help you stay dry while camping and traveling in your RV and also help identify leaks so they don’t cause major damage while your motorhome or trailer is in storage.
Doing a quick localized visual inspection after you hear a branch scrape the roof or your rig is exposed to extreme rains and winds is also good practice. If you store your RV outdoors in the winter the excess weight of snow buildup can stress and crack the seams along the roofline.
Check out my article on how much snow an RV roof can hold for more information.
Getting On Top Of Your RV Roof
The only way to perform a proper inspection of your RV roof is to get up on top and walk around. If you inspect your roof regularly you can find areas that need repairing before roof rot starts, you can fix this as a simple DIY job at a minimal cost.
Having a ladder that can get you up along the seam line where the roof meets the sidewalls is the easiest way to inspect the full 360 degrees around your motorhome or trailer.
I personally use a telescoping ladder that collapses down small enough to fit in my lower storage compartment. Having a ladder on board is the best way to properly clean, inspect and repair those hard to reach parts on my RV.
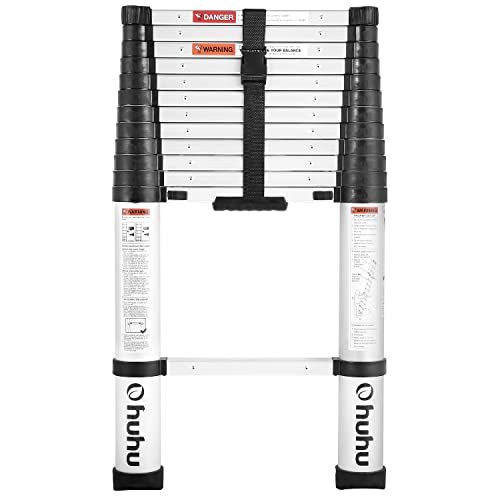
- One Button Retraction: Convenience is key! That’s why we’ve designed this telescoping ladder with easy one button retraction. Simply...
- America National Standards Type I Ladder: Ohuhu extension ladder has passed the test of ANSI-ASC 14.2-2017 American National Standard for...
- More Than 60% Overlapping: This collapsible ladder is crafted from high-quality aluminum alloy and with more than 60% overlapping on each...
Not inspecting an RV roof and only finding a problem when it has grown into a catastrophic situation may require replacing the whole roof. The cost may be more than the RV is worth, resulting in you totaling an otherwise perfect RV.
Check The Roof For Soft Spots
When carrying out a visual inspection of the roof, focus on areas with visual damage and feel for soft spots. Leaks and damage typically occur around roof vents, air conditioning units as well as antennas and seams.
If you notice any cracked or peeling caulking or sealant I highly recommend that you scrape it away and replace it as soon as possible, even if it has not created any noticeable damage yet.
Inside the RV open up the overhead cabinets and tap on the ceiling. Carefully check around the edges of any equipment that passes through the ceiling (Air conditioner, Solar Panel Cables, etc.), and also check the ceiling above the doors and windows.
Soft spots are wood rot caused by water build-up from a leaking roof and must be treated urgently.
Regularly Check Your Ceiling For Water Stains
Keep an eye on your RV’s ceiling. If you see a brown (or another color) stain shaped like a puddle or a dark patch that appears in the corner of the RV, this is a sign of a leaking RV roof.
RVers know that keeping up with maintenance is a top priority and we also know the sting of bringing our rig in for service. For the price of one trip to the mechanic you can have the Fix It Yourself video training course and save a lot of time and money the next time you have problems with leaks, appliance malfunctions or regular maintenance.
Brown And Black Spots Are Signs Of Algae And Mold
The first indication that your RV’s roof is leaking could be the appearance of brown and black algae and mold growth on your walls. Not only is this a sign that your RV needs some serious tender loving care, but algae and mold can be very harmful to your health.
Mold and algae growth might not automatically mean a leaking roof, but it could also indicate that there may be a problem with humidity control in your camper. Whatever the reason, it needs to be addressed urgently.
Check out my recent article on how to control the humidity in your rv or trailer
Cracked Sealant Is A Sign Of A Potential Leak
Sealant is installed to stop joints and openings around vents, windows and other places where two or more components meet from leaking. As the sealant ages it becomes brittle and shrinks under the changing environmental conditions and UV from the sun.
The silicone or caulking needs to be checked regularly and removed, surface cleaned and replaced as soon as it becomes compromised. I use Lap Seal on the roof because it self levels creating a high quality bond in the seams and joints.
No products found.
Delamination And Exterior Spotting
Regularly walk around your RV and visually inspect for any delamination in the exterior finishing. It will show as a bubble or outwards bending (sometimes called rippling); this is caused by moisture getting between the fiberglass and sidewall and separating them. Delamination often starts near door or window openings.
How Is An RV Roof Constructed?
Most RV’s use composite wood made from the by-products and offcuts of other wood products; this includes strands, particles, sawdust, fibers, veneers, or wood boards, bound together with adhesives. This material is cheaper than natural wood; it also absorbs more moisture than real wood.
RV roofs are constructed using trusses that consist of several pieces of wood that are glued, stapled, and gusseted together with metal brackets. These engineered systems are prone to rotting. If there is a leak, they will absorb water and hold it.
The roof system is covered in a roofing material to protect it and to ensure a long life. The standard roofing materials on RV’s are:
- EPDM stands for Ethylene Propylene Diene Monomer. It is a single membrane synthetic rubber material.
- TPO rubber roofs consist of a single-ply material that bonds polypropylene to ethylene-propylene.
- Fiberglass roofs are made using a mix of synthetic materials and glass fibers laid out in panels or as individual sheets.
- Aluminum roofs consist of a silver-white metal made from sheets of aluminum roofing.
How To Fix A Soft Spot
If you find evidence of leaking in your RV before a soft spot develops, the leak can generally be patched or resealed. Depending on the type of roofing, there are proprietary products available that you can use for the repair.
If your RV has already developed a soft spot, it means that wood rot is already present. The roof must be opened, and any damage to the ceiling, trusses, or sheathing must be fixed.
Let’s look at each step needed to fix the problem.
- Working in the inside of the RV, remove any fittings, ventilation points, or other items from the area you will repair. You may have to also work on top of the roof to loosen any clamps, seals, wiring, or roof trim. Check that your RV manufacturer allows this. If there is any doubt, place a plywood sheet on the roof, making sure it covers a large enough area and spans several trusses. Only stand on this sheet.
- It’s a good idea to photograph each part you will remove; this will help you remember how to reinstall it after the repair is completed.
- To soften the roof coating around the object to be removed, you can apply a heat gun.
- Scrape away any excess coating and remove it.
- Now is the time to remove whatever material has been used to cover the roof.
- Remove the sheathing plywood which rests between the roof covering and the trusses.
- The plywood is generally attached to the trusses and walls.
- Do not damage the trusses when removing the sheathing.
- Remove any insulation materials.
- Remove the damaged trusses.
- Use the same thickness and grade of wood to prepare replacement timbers.
- Place the damaged truss on the replacement timber and outline with a marker. Cut the replacement timbers out. Make sure they have exactly the same dimensions as the trusses you are replacing.
- Install the replacement trusses.
- Place a carpenter’s level on the boards to ensure a straight and level fit.
- Reroute any wires which may run through the trusses.
- Replace the plywood roof sheathing and secure it to the trusses and walls in the same positions in which it was previously attached.
- Apply heavy-duty construction adhesive and screw the plywood in place
- If you have removed any light fittings, hatches, vents, or items that protrude through the roof, mark where the fitting should be and then use a jigsaw to make the correctly sized opening through which it will fit.
- Follow the manufacturer’s instructions to apply the new roof coating over the repair. Allow the coating to dry.
- Reinstall the molding and roof trim. If the ceiling panels on the interior side of the roof are damaged, it is a good idea to replace them.
Conclusion
Soft Spots in an RV’s roof show that damage has occurred to the roof structure and needs to be attended to quickly. Regular inspection and maintenance can prevent the causes of soft spots on an RV’s roof.
If a soft spot does develop, a DIY fix is possible; however, if you are uncertain of your mechanical skills, it may be wise to contact a professional