This post contains affiliate links.
RVing is a great way to enjoy camping without the hardships of roughing it, especially bathroom access. If the toilet in your RV is leaking around the base the problem is either a bad flange seal, loose fitting, cracked toilet bowl or cracked water valve. Fixing a leak around the base of an RV toilet is simple enough that anyone can do it.
If your RV toilet is leaking around the base, the first thing to check is for a bad flange seal between the toilet and the black water tank. To repair it, you need to:
- Buy a new flange seal that matches your toilet model
- Shut off the fresh water to the toilet
- Flush the toilet to drain it
- Remove the entire toilet from the floor
- Replace the toilet seal
- Put the toilet back and turn the water back on
Repairing a leak at the base of your RV toilet in a recreational vehicle or camper is a simple task that doesn’t take a high level of skill. Start by gathering your tools and equipment
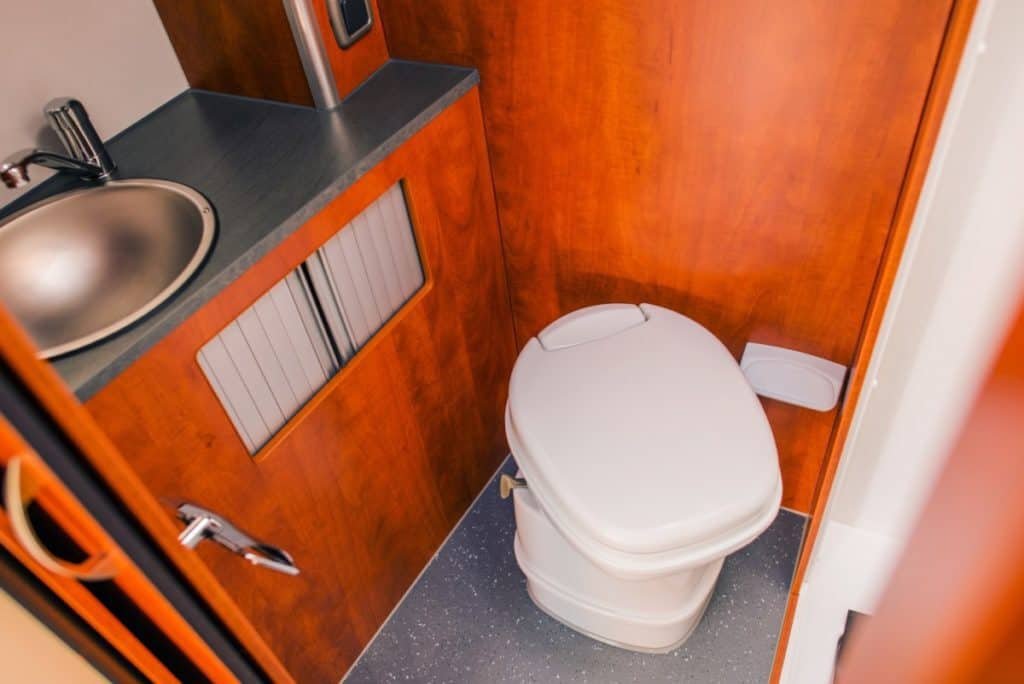

Table of Contents
Equipment List
You don’t need any specialized equipment to fix a leaking toilet, but you do need a few tools.
- Replacement for your RV toilet seal model. RV toilets don’t use standard plumbing parts; you have to get parts specific for your RV toilet. Repair kits and seals are sold at RV dealers or online. This flange seal found at Amazon is compatible with most Thetford RV toilets, a very common RV toilet manufacturer. They are also referred to as a closet flange seal.
- Wrench or socket set. The toilet is held in place by two (or sometimes three) bolts. You can use an adjustable crescent wrench to remove them in a pinch, but it’s better to use good wrenches or sockets.
Pro tip: In some models, the toilet flange bolts can be hard to reach. A socket set with a u-joint and long driver extension bar (link to Amazon) can save a lot of frustration trying to get to them.
- Putty knife. Sometimes the old flange gets gummy and hard to remove. A putty knife will help pry it loose.
- Teflon tape. Any time you disconnect plumbing fittings, it’s best to apply a sealant like Teflon tape to the pipe thread before reconnecting.
- Hand mirror to check the backside of the toilet for leaks.
- Old towels. There is always some stray water here and there in any plumbing project. Have some old towels handy to dry things up.
- Cleaning supplies. Pulling a toilet can sometimes get messy. Also, hard-to-reach areas will be accessible while the toilet is out of the way. You might as well clean up while you can.
- Rubber gloves. You know why.
No products found.
That’s it. Besides the new flange seal itself, the most specialized tool you need is a socket driver extension. You don’t really need that but it makes life easier. Once you have your equipment together, you can replace the flange in just a few steps.
Step 0: Verify Leak Location First
Before you pull up your RV toilet, take a moment to verify that the leak really is coming from under the toilet. You don’t want to pull the toilet up if the leak is coming from somewhere else. Use the hand mirror to look at the back of the toilet and the bottom of the fittings to see if they are leaking.
Check the toilet bowl for cracks and check to make sure water isn’t leaking higher up and running down the outside of the toilet. Some other common leaks include the water inlet valve and the flush valve. Checking the outside of the toilet also lets you verify the model number for parts.
One good sign the leak is coming from under the toilet is that the toilet only leaks after a flush. That’s the only time water passes through the flange, so it should only leak then. Once you have determined the cause of your RV toilet leaking, it’s time to get to work.


Step 1: Shut Off The Water
In any plumbing project, the first step is always to shut off the water supply. Most RVs have a water valve leading into the toilet that lets you shut off the water supply. If your RV toilet doesn’t have a shut off valve, disconnect from your water hook up and turn off your water pump.
Once the supply of water is off, flush the toilet to empty it and get the water out of the way. If you shut the water off properly, it won’t refill. Here’s some more tips on how your RV water pump works with your water system.
Step 2: Disconnect and Remove Toilet
RV toilets are held in place by two or three bolts through the wax seal or flange. They may be covered—look for caps sticking up from the base of the toilet bowl. Remove the caps (you may have to use the putty knife to pry them loose) and set them aside. Use a wrench or socket to remove the nuts from the flange bolts.
The placement of these bolts may vary. Household toilets always have two bolts, one on each side of the toilet. Some RVs use this placement, some use a bolt in front and in back, and some use three bolts.
Unscrew the toilet water line from the inlet valve so that you can pull the toilet away from the wall. If you don’t disconnect the water line, you won’t be able to move the toilet very far.
Pull the toilet straight up off the flange bolts and set aside. If it’s very messy, you may want to put it on a towel or in a garbage bag to keep the floor clean. Here’s what to do if your black tank is clogged and causing problems with your toilet.
Pro tip: Dropped Tool Protection – Once the toilet is out of the way, you want to either block the drain hole with a rag or plastic bag. While not totally necessary, it’s nice to be protected if you are prone to dropping tools down the drain. It’ll also help keep the sewer smell going from the black tank.
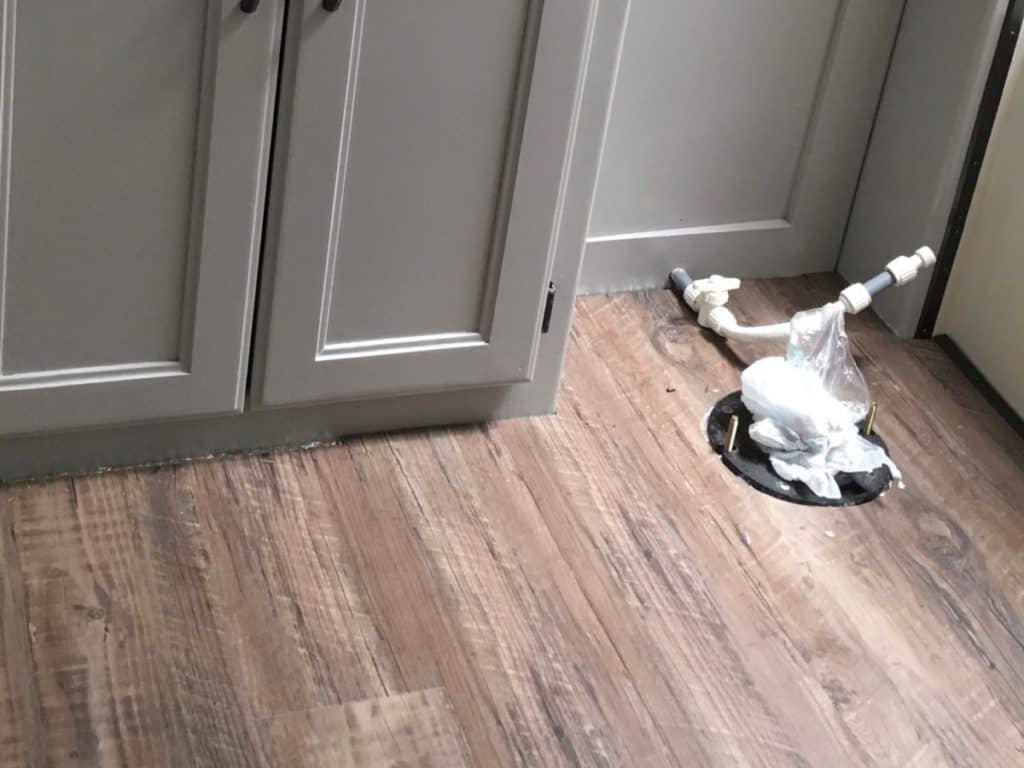
Step 3: Remove the Old Flange Seal
The flange seal may be around the drain hole beneath the toilet, or it may be stuck to the bottom of the toilet. Either way, you have to find it and remove it.
If it is particularly old or made of wax, you will need to use the putty knife to loosen it and scrape away any old gunk left behind. You want the base of the toilet and the floor flange clean of debris so the new seal can make a good connection.
Step 4: Clean Toilet Base Area
While the toilet is out of the way, it’s easy to reach the wall behind it and the floor around the base. Scrub those clean while they are accessible.
You can also clean the base of the toilet while it is removed. Hose that sucker down to get rid of any leftover particles.
Step 5: Replace the Flange Seal
Once everything is clean, put the new flange seal in place. Center it around the toilet drain flange and follow any specific directions that came with the new seal. If there are none, which there likely won’t be, just setting it in place is enough.
Step 6: Put the Toilet Back
If you had blocked the drain before, now is the time to remove rag your stuff in there. Slip the RV toilet back over the flange bolts and center the toilet drain in the flange seal. Make sure to get the toilet, the drain, and the flange connected properly. Once it is seated, re-tighten the nuts.
Pro tip: To help get a good connection between the toilet and the flange, gently sit on the toilet once it is properly placed on the drain with the flange. Your body weight will help set the toilet in place prior to tightening the nuts. This will help prevent a future toilet leak.
Pro tip: Don’t over-tighten the nuts! If you torque the nuts down too hard, it will break a porcelain toilet. It can also damage a plastic toilet. You want the nuts firm to hold the toilet in place, but they don’t need to be torqued down like lug nuts.
Many people want to know about replacing an RV toilet with a standard house toilet, here’s all the details.
Step 7: Reconnect the Water Supply
Clean the threads on the water supply nozzle and apply some Teflon tape or pipe sealant. Sometimes the old sealant will hold after being disconnected, and sometimes it won’t. It is easy and simple to replace, and the fresh sealant will keep the connection from leaking.
Step 8: Turn On the Water and Test the Toilet
When everything is reconnected, turn the water supply back on and test all the connections. Flush the toilet a few times, then check everything for leaks. If you did everything right, the water will all stay inside the toilet. If you made mistakes, it’s better to find them now than when you are camping.
Your toilet is now fixed and ready for your next RV adventure. If you have other issues like your RV toilet is running, don’t worry I have an article dedicated to fixing this issue too and it’s super simple.
Fix It Yourself RV Maintenance Course
The most costly parts of RV ownership are repairs and maintenance. That’s why I recommend learning to do your own RV repair and maintenance.
The Fix It Yourself RV Maintenance Course is the perfect way to learn how to do the most common repairs and maintenance on your RV. A Certified RV Technician wrote and filmed the course so you know the information is actually correct.
Plus it’s downloadable so you can access it from anywhere, even when boondocking in the middle of nowhere with no service.
Find out more about the best RV Maintenance and Repair Course available!
Must Have RV Repair Tools
No products found.
No products found.
