This post contains affiliate links.
RV’s require a lot of learning and upkeep. Whether you just bought your RV or you’ve had it for years, you are bound to run into some maintenance work every so often. One thing you will be faced with at some point is a running toilet. Luckily there are only a couple things that can cause this, and they’re relatively easy to fix.
The main cause of an RV toilet running is the water valve. It may be stuck or need to be replaced. Replacing the water valve is a simple fix you can do yourself.
Fortunately, a running RV toilet is a pretty easy fix even if you aren’t that “handy”. Unfortunately, a running RV toilet might cause you more issues if left unchecked since your toilet bowl may overflow.

I’ll cover below how to replace your toilets water valve on two of the most common RV toilet models, the Thetford Aqua Magic V and the Dometic Series 300.
No products found.
No products found.
Table of Contents
Things To Check Before You Replace The Water Valve
As I mentioned the most common culprit to a running toilet is the water valve. You should keep in mind that the valve normally adds anywhere from 1 to 4 inches (depending on your model) of water to the bowl as a seal against blackwater tank smells. If your toilet fills a bit then stops it’s functioning normally and you don’t need to do anything.
Otherwise, we can hope the water valve is only stuck and we can get it moving again with a bit of force. This is called the “SNAP” shut method. Do a couple of forcefull flushes letting the flush lever or foot pedal snap to close and see with this unsticks the water valve.
If the “SNAP” method doesn’t do the trick then investigating the flush lever or pedal is another simple check you can do before taking the toilet apart. Some of these simple fixes will be specific to your model of toilet. Having a close look at your toilet to see if any of the quick fixes below will fix your toilet running issue.
Some older toilets have a roller valve that flushes the toilet and might need lubricating. Remove the cover on the foot pedal and you should see the roller valve. Apply some dry silicone to the roller while moving the pedal up and down. This fix has worked in the past but isn’t a guarantee and you might have to repeat the process now and then.
Some Thetford models have a plastic pin that can get stuck during flushing. In this case, you will have the replace the spring pack located behind the pedal. Sometimes the spring will pop out of place but getting the spring reseated is very difficult. It’s much easier to just fully replace the spring. If the spring is out of place it can prevent the flushing valve from closing properly letting water flow into the toilet
If none of these quick fixes work for you then you’ll have to replace your water valve. In the event you are on the road and don’t have access to an RV parts store or Amazon then a bandaid solution to stop your toilet running is to turn off the shut-off valve at the back of the toilet after you’ve flushed. It’s not perfect but it’ll give you peace of mind that your toilet won’t overflow.
No products found.
No products found.
Preparing To Fix Your RV Toilet
No matter what the cause of the problem is it’s best to review your toilet’s user manual. If you don’t have a manual you should be able to find it online assuming you know the make and model of your toilet.
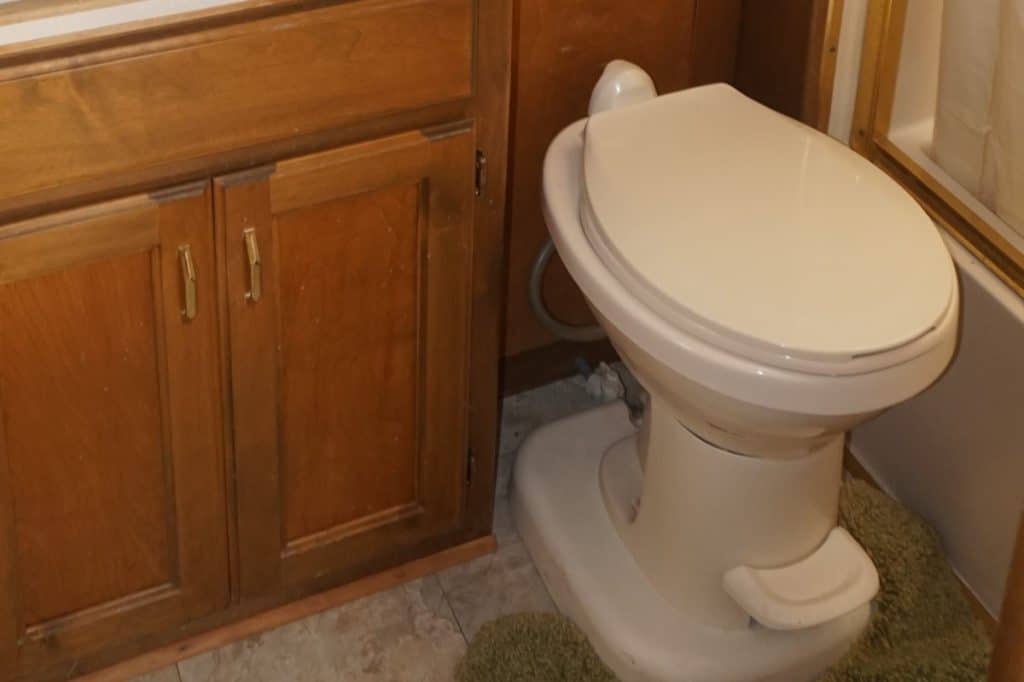
If you aren’t sure what make or model your RV toilet is there should be a label on the back of the unit that will tell you. The label may be located on the center front under the rim or behind the seat, check by lifting the seat halfway. Otherwise, you can review the models available on the Thetford or Dometic websites and see which is a visual match. Best guess you have one of the Thetford Aqua Magic toilets or a Dometic 300/310/320 series, these are the most common RV toilets.
Before you start on this project you’ll want to have all the necessary parts. Check Amazon or your local RV store for a new water valve. You’ll also need a new toilet closet seal since you’ll be removing your toilet.
Use the manufactures website to find the parts you need for your specific make and model, go here if you have a Thetford and here if you have a Dometic. Our toilet is a Thetford Aqua Magic V and our water valve is referred to as a water module.
Once you have all of the necessary parts, fixing a running RV toilet really isn’t that difficult of a job. The key is to make sure you have everything you need before you even get started.
Remember to always make sure you turn the water off before working on your toilet. This includes turning off the shut-off valve and disconnecting the city water supply or turning off the pump. Giving the toilet a flush will release any residual water pressure.


How To Replace A Water Valve On An RV Toilet
At this point, you should have sourced your new water valve and have it in hand. You’ll need a few other items before we get started replacing the water valve.
Tools and Supplies:
- Adjustable Wrench
- Screwdriver
- Old towels
- Garbage bag
- New water valve
- New closet flange seal
- Rubber Gloves
Remove Your RV Toilet
- Turn off the water shut off valve at the toilet as well as the water pump and city water
- Flush the toilet until all water is out of the bowl and doesn’t run anymore
- Place towels around the back of the toilet to catch any residual water
- Disconnect the water supply line from the toilet
- Remove the covers on the bolts holding the toilet to the floor if they were installed before.
- Unscrew or remove the nuts on the bolts using the adjustable wrench (keep these and the bolt covers in a safe place)
- Put your gloves on and get your garbage bag open and ready next to you
- Gently lift the toilet up off the bolts, it should be very easy to lift, and place it in the garbage bag.
- Throw out the old closet flange seal (piece of rubber between the toilet and the waste pipe) and plug the black tank hole with some plastic to reduce the smell
Now that your toilet is removed you can easily access the water valve to replace it. The position of the valve will be a little different depending on the model of your toilet. I’ll go over how to replace the water valve on both a Thetford model and a Dometic model.
Replace The Water Valve On A Thetford Aqua Magic V RV Toilet
The Aqua Magic V toilet by Thetford is a very common model of toilet used in the less expensive models of RVs. It’s the one we replaced our old toilet with and could easily get on Amazon for around $100 at the time of purchase. The water valve is referred to as a water module for this toilet. You can find the water module replacement on Amazon as well.
- Face the toilet away from you so you have easy access to the back
- Using a Philips screwdriver remove the retaining screw
- Pull the flush tube off of the water module
- Lift the locking tab and slide out of the groove
- Lift up on the metal link as far as it will go then tilt away from you and lift up out of the lever arm. The link has a slight hook in the end.
- Throw out the old water module
- Install the link (on the new water module) into the lever arm hole. You’ll follow a similar tilt away from you then push down, basically the reverse of step 5
- Push white plastic hook (link is connected to) up until it is in the closed position.
- Slide groove into the track, gently adjusting the module to line up the track, stop about halfway once your flush tube lines up with the hose outlet
- Push the flush tube all the wat onto the hose outlet so the tube is over the rubber seal
- Continue pushing on the module until the locking tab fits into the hole.
- Replace the retaining screw
- Reinstall your toilet (jump to section here)
Below is a very useful YouTube video I found that goes through all the steps to replacing your water module. I’ve listed the times in the video if you want to jump to a particular section.
- 3:25 – Start of removing the water module
- 3:57 – Link Removal from, step 5
- 5:29 – Start of module replacement
- 6:29 – Connecting locking track, step 9
- 7:10 – Tube attachment, step 10
Replace The Water Valve On A Dometic 300/310/320 Series RV Toilet
The Dometic 300 Series toilet is another very common RV toilet. Replacing the water valve on the 310 Series and the 320 Series is the exact same process as the 300 Series. It’s even the same part which can be found, here, on Amazon. Just be aware there are knockoff parts available for half the price of the Dometic brand ones.
- Face the toilet away from you so you have access to the back by the foot valve
- Disconnect the water line from the vacuum breaker, you’ll need a screwdriver to loosen the clamp before you remove the water line. Again you’ll want towels handy for any leftover water.
- Remove any screws that are holding the valve in place, there may be two, Phillips screws
- Press on the top and bottom latches to release them, then pull the water valve out of the housing. A flat head screwdriver can help with this
- Push the new water valve into the housing until latches engage
- Secure water valve with supplied screws
- Reconnect water line to vacuum breaker and secure with hose clamp
- Reinstall your toilet (see next section)
Here is a simple, short video on replacing the water valve in a Dometic 300 Series toilet.
Reinstall Your RV Toilet
In generally you will just reverse the steps you took when you removed your toilet in order to reinstall it but I will lay them out for you here.
- With your toilet upside down, install the new closet flange seal lip side out on the bottom of your toilet (you’ll want gloves on when dealing with the bottom of your toilet)
- Place the toilet overtop of the black tank hole (plastic has been removed of course) lining the bolts up with the holes on the base of the toilet.
- Reinstall the nut on both bolts till finger tight.
- Wiggle the toilet a bit and tighten bolts with your wrench. Alternate between bolts so the bolts are tightened evenly and your toilet is level.
- Replace bolt covers
- Reconnect water supply line to the water valve. Only tighten it finger tight.
- Turn water back on and check water supply is not leaking.
- Flush your toilet and confirm water does not continue to run and there is no water leakage from the water valve.
Final Thoughts
Overall it’s a relatively easy fix to replace the water valve in your RV toilet. This should fix your toilet running issue.
Just remember to take your time and refer to your manual if you don’t know what some of the parts are. This project will take a little patience and a willingness to learn, but doing it yourself will save you money in the end.
If you are having issues with your toilet leaking around the base, I have a full step-by-step tutorial walking you through fixing this issue.
Fix It Yourself RV Maintenance Course
The most costly parts of RV ownership are repairs and maintenance. That’s why I recommend learning to do your own RV repair and maintenance.
The Fix It Yourself RV Maintenance Course is the perfect way to learn how to do the most common repairs and maintenance on your RV. A Certified RV Technician wrote and filmed the course so you know the information is actually correct.
Plus it’s downloadable so you can access it from anywhere, even when boondocking in the middle of nowhere with no service.
Find out more about the best RV Maintenance and Repair Course available!