This post contains affiliate links.
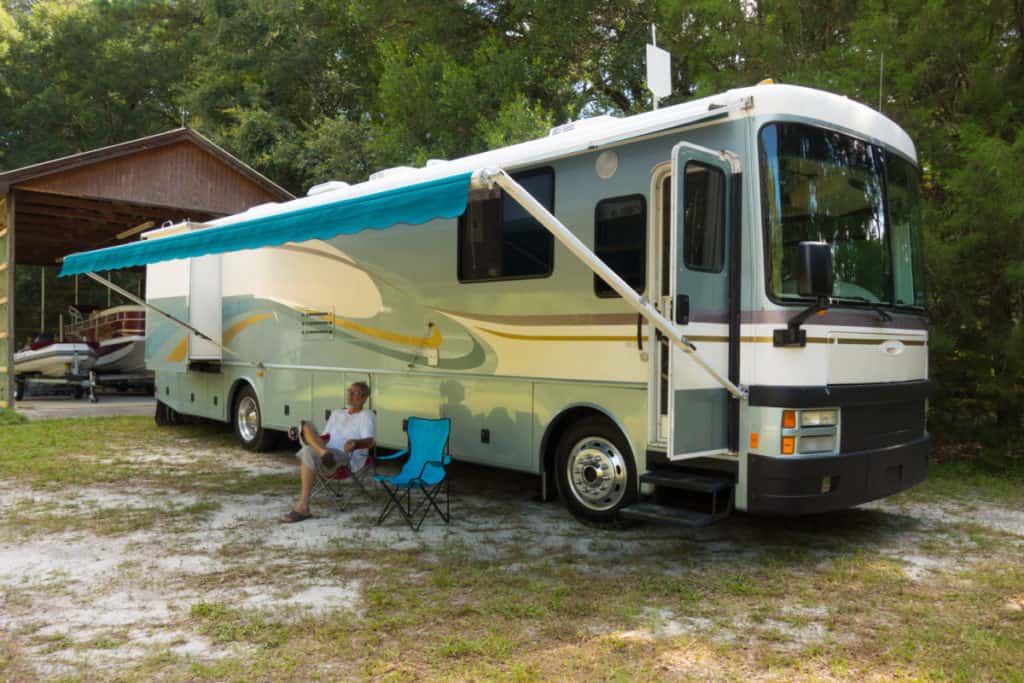
Awnings are an important part of an RV. They keep you shaded and help keep your RV cooler by keeping the sun off the side of your RV. Unfortunately, damage can occur to your awning from normal wear and tear or from wind and bad weather. Shortening your awning may be an alternative to fully replacing it since new awnings are expensive.
You can shorten an RV awning by disassembling your awning, cutting the tube, resewing the fabric, and reinstalling. No special tools are needed but several people are required to make removal and reinstallation easier as well as some sturdy ladders.
Shortening an awning is not a particularly difficult task but it does take some time and effort to accomplish. There are also some hazards to this task since an awning is a bit ungainly to manage and the tension springs that control the retracting of the awning can be powerful. In this article you’ll find the exact process for how to shorten your RV’s awning.
Before diving into this project you need to be aware of how your awning works and you can find all the details in my article.
Table of Contents
Tools Needed to Shorten an Awning
Here is a list of suggested tools that you will likely need to shorten your awning. This list may vary depending on your specific awning. Research your make and model to help determine the best way to start your project.
Take a thorough look at how your awning is installed to make sure you have the proper tools and bits required so you don’t need to dash to the hardware store in the middle of your project.
- Straight edge
- Cordless Drill (Amazon link)
- Bits
- Razor knife or Heavy Duty Fabric Scissors
- Screwdrivers
- Hammer
- Step ladders
- Wrench or sockets
- Vise Grip (Amazon link)
- Rivet Tool (optional) (Amazon Link)
- Hack Saw (Amazon Link)
- Metal File
- Fasteners – types will be specific to awning make and model
- New Awning Mounting Hardware (if required)
- Exterior Silicone or sealant
While not exactly a tool YOU MUST have at least one other person to help you with this project. It would be extremely dangerous to attempt this on your own. When we repaired our awning we had three people helping but a fourth would have been extra handy at times.
Why Shorten Your Awning?
Shortening your awning is something that may not have occurred to you beforehand. However, adjustments can be needed at any time, and for quite a few reasons.
- The material has been damaged
- Purchased the wrong size replacement
- Purchased a used awning
All of these seem like great reasons to shorten an awning. Replacing an awning is an expensive prospect. If you can find a great deal on a replacement awning, but it’s the wrong size you can shorten it. Carefully measure and even sketch out your idea. Make a note of anything that you don’t understand and research it.
If you want to shorten your awning because of damaged material, check a few things first. Is the rest of the material in good shape? Are there any cuts or tears further up the material?
It might be best to just replace the awning fabric especially if the tear occurs where the awning meets the roof. The poly cord on both the roof edge and the tube edge is required to feed the fabric through the channels on the tube and roof edge.
How to Shorten Your Awning
Step 1: Inspect Awning
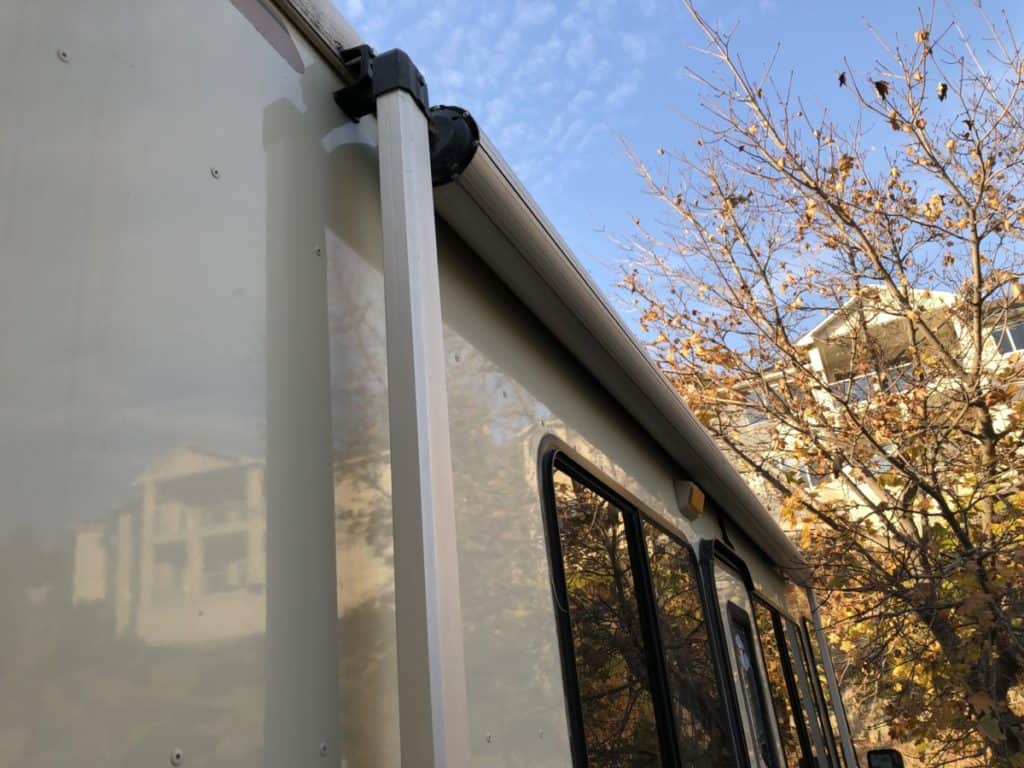
As I mentioned above, thoroughly check how the awning joins the roof of your RV. A picture is worth a 1000 words and much better than a bad memory. You will need a gameplan to reattach it.
Take many pictures of the current installation and use markings to help you understand how everything goes back together.
This is also the time to measure how long your current awning is. Awnings are measured from the arm to arm so make sure you know how long your current awning is and have a clear plan as to how much you need to shorten the awning.
Step 2: Stow the Awning
Start by stowing your awning so it is completely rolled up then extend it about a foot or two. This puts the torsion springs (the mechanism that lets it extend and retract) into the extended position so it shouldn’t snap back at you when you disconnect it from the RV. You can also access where the awning attaches to the roof.
Step 3: Disconnect Awning from your RV
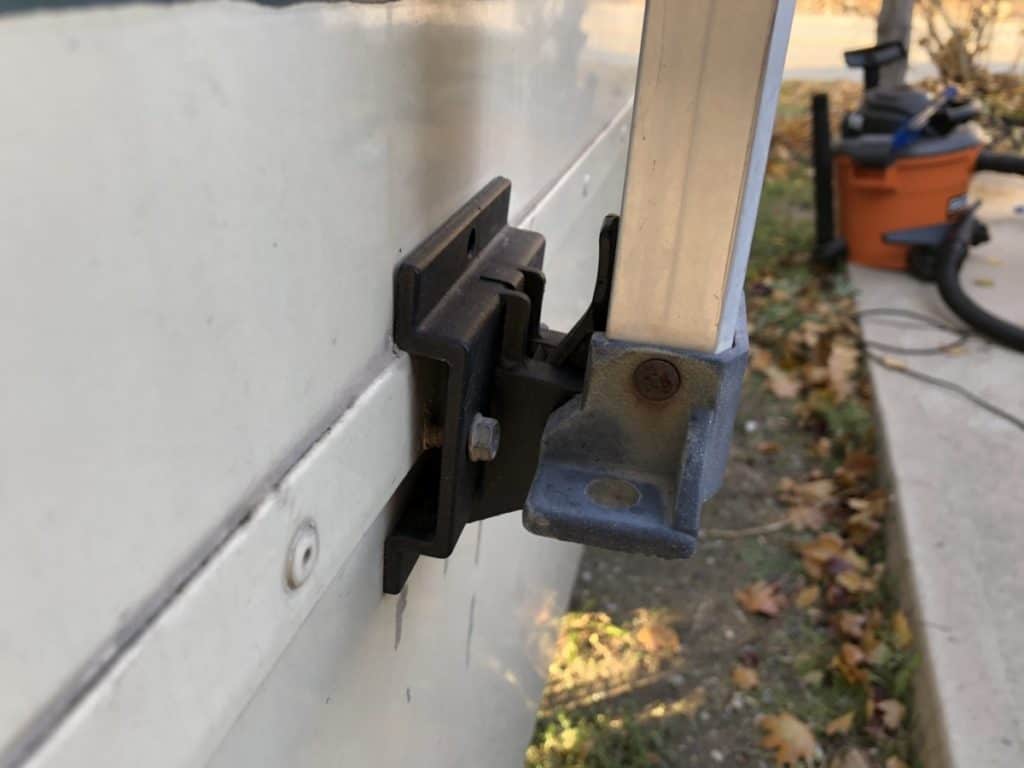
Next, pull the legs of the awning out of the clips near the bottom of the RV. You can leave the awning to hang for the RV with the legs leaned up against the RV for support.
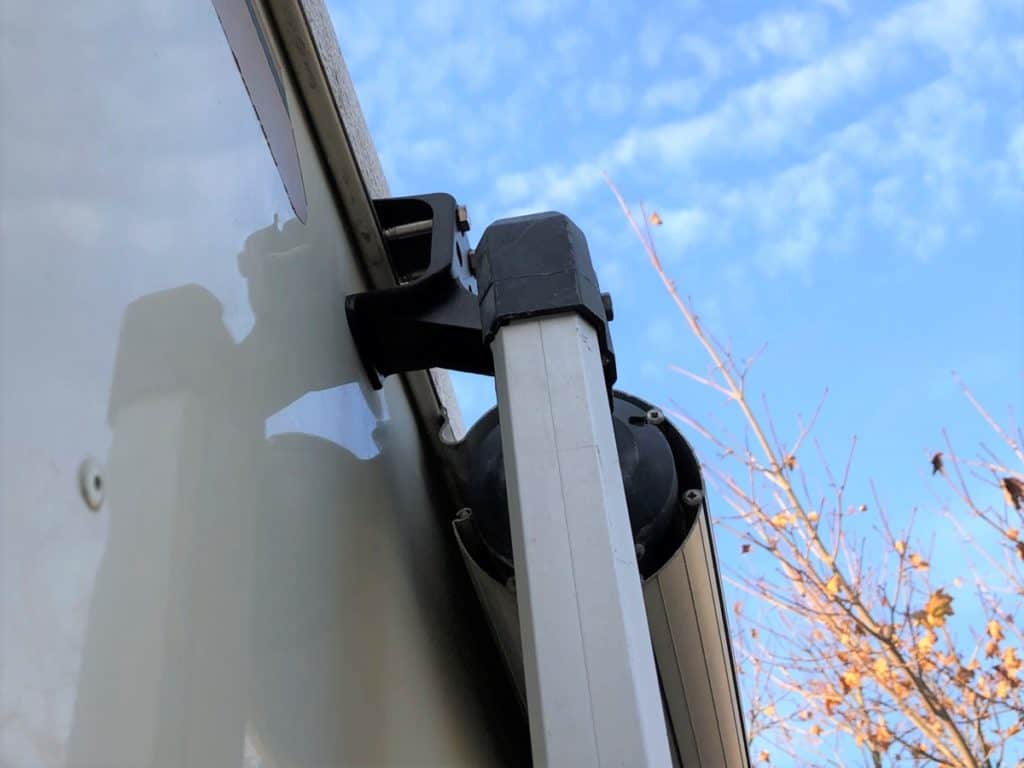
Now, remove the bolts from rafter brackets, these are at the top of the awning that connects the legs to the RV. There should be two bolts on either support. Use your socket or wrench to unscrew the bolts. Your helper can help support the awning while you’re disconnecting it.
Then you need to remove the screws that hold your fabric in place and slide the fabric out of the top rail. This can be a bit tricky and awkward and is the perfect time to enlist some extra help.
As a side note, our RV actually had a metal awning cover as the first foot of the awning. We had to unscrew a couple of screws in this part instead of the fabric and slide it out of the top rail. Every RV will be a little bit different but the general process will be the same.
Step 4: Unwind and Remove Torsion Springs
Now that you have disconnected your awning, you’ll want to lay it out on a work surface. A couple of saw horses or a picnic table will keep your awning off the ground and easier to work on.
Using vise grips take a firm hold of the cap on one end of the awning. You can place some electrical tape on the vise grips to prevent them from damaging the end cap. While one person firmly holds the vise grips the other can remove the bolts connecting the leg (aka rafter) to the awning then take the rafter off the end cap.
Carefully unwind the torsion spring by rotating the vise grips. Count how many full revolutions it takes to release the spring. You’ll need this number when we reassemble the awning later. Expect around 10-11 revolutions.
Make a mark on the end cap and the awning tube so you know where the cap fits back on the tube later. Then drill out the rivets connecting the end cap to the tube. You might need a flat head screwdriver to tap out the heads of the rivet.
Remove the cap and pull the torsion spring out from inside the tube and set aside. Pay close attention to how the springs are assembled because they will need to be reassembled the same way.
Now repeat the same process on the other end of the awning. Again be very careful to have a firm hold on the vise grips when you unwind the spring.
This video on YouTube is extremely helpful to understand how you go about the process of taking apart your awning. Technically it’s about replacing the fabric of your awning but the process is similar.
Step 3: Cut the Awning Roller Tube
Next, you’ll unroll the fabric from the awning tube, it’s easiest if you roll it up as you go so the fabric stays neat and more manageable. Then you’ll slide the fabric out of the channel. If you have a valence you’ll need to repeat the process with the valence.
Now we will cut the tube of the awning. If you are replacing your current awning with a new or used one and need to cut the tube to match the old awning. If you are shortening your awning due to damage you’ll need to decide how much of the tube you need to cut.
When reducing the tube length, mark the tube exactly where it needs to be cut. Measure down from one end of the tube and mark a line all the way around. This way you can ensure you are keeping your cut as straight as possible. Don’t forget to transfer the marking you made to line the tube up with the end cap to the other side of the cut line.
Grab your hack saw and some gloves and have your buddy brace the tube for you. Follow your line around the tube doing your best to keep the cut as straight as possible. The metal may heat up as you cut due to friction so be careful. Once you are through the tube you can use a metal file to clean up any rough edges.
After you make the cut make sure that the springs and end caps fit correctly. Line up the endcaps exactly as they go on the tube, mark on the tube any holes required for screw or rivets. Remove the springs and end cap again and drill any screw or rivet holes required. Do this before installing the fabric.
Step 4: Shortening the Fabric
Now the fabric needs to be shortened or replaced to match the new tube size. Unroll the awning fabric on a large flat surface. If you are reusing an older awning carefully inspect the fabric for any spots that need to be patched.
Have a look at how the edges of the fabric have been finished. You’ll want to reproduce this method as closely as possible. Mark along the edge of the fabric how much you need to cut, it should be similar to the amount you reduced the tube by. Use your straight edge to make a nice straight and even line. Cut the fabric with a pair of high-quality sharp scissors. Dull scissors will not give you a clean edge and be a pain to work with.
Next, you’ll need to sew the edges of the fabric to prevent fraying. Do your best to replicate the edge finishing method that was used before. You’ll want to use a very sharp needle specific to heavy-duty canvas, go slow and steady while sewing and have some help feeding the fabric through the machine.
Most home sewing machines aren’t designed to sew this type of heavy-duty fabric so you’ll want to be careful to not damage your machine.
Alternatively, you can look for a local awning company and have them shorten your awning fabric for you. Or buy new fabric for your awning that is the correct size.
If you need to shorten your awning in width, not length, i.e. the direction perpendicular to the RV, then you’ll want to keep the original “roof” edge and tube edge intact. You need these “rope” edges to reinstall the fabric in the tube channels and the roof channel.

- Ideal fabric replacement for ALEKO 12x10 ft retractable awning
- Terrific value
- Compatible with almost all other awnings brands of this size
Step 4: Reassemble
Now it’s time to put it all back together. Basically you will just reverse the steps it took to take apart your awning.
Start by sliding the fabric back into the awning tube, if you have a valence you’ll install it as well. Once the fabric is back in place and secured you’ll insert the torsion spring assembly in the tube and replace the end cap ensuring the marks you made on the cap and tube line up.
You can rivet the end cap in place using a basic hand riveting tool or if your end caps allow use bolts to secure it in place. Repeat this process on the otherside so both torsion springs and end caps are fully installed but there is no tension on the spring yet.
Now wind your fabric back onto the tube so there is about a 1-2 foot extended similar to how it was when disconnected from the RV. This will keep your fabric out of the way and ready to be reinstalled.
Grab your vise grips and firmly secure them to the end cap. You’ll start winding the spring applying tension, this is where you need to recall how many revolutions you unwound it originally. Once fully wound reattach the awning leg to the end cap. Repeat this process with the other spring and leg.
The video below is the second part of the first video showing how to reassemble and reinstall the awning.
Step 5: Reinstall Awning on the RV
If you’ve had to shorten your existing RV’s awning you will need to move the rafter brackets. Of course one can stay in position but one will need to be moved to accommodate the new size of the awning. Measure the distance between the bolt holes on the awning then mark them on the side of the RV. Predrilling the new bolt locations will make it easier to install the awning rafters.
You will need to repeat this process with the lower leg clips but it’s probably easier to do these once the awning is reinstalled to ensure you place them in the correct location. It’s a good idea to check there is proper backing behind where the leg clip is being moved to before you start drilling holes. It may need to be reinforced.
When reinstalling the fabric in the channel along the roof of the RV it’s best if you have three people available. One on a ladder feeding the fabric into the channel and one on each leg to slowly walk the awning along the length of the RV. This is an awkward part of the job so take your time and treat your fabric gently. You wouldn’t want to damage your fabric at this point. Putting some electrical tape on the start of the channel may help you feed your fabric through and protect it from being damaged by the edges of the channel.
Prior to bolting on the rafter brackets, you’ll want to add some silicone or sealant around the bracket holes to prevent any water infiltration into the roof. If you have moved one of your brackets you’ll need to fill the old holes as well and even get some extra bolts to fill them.
Install both rafter brackets and tighten the bolts. Then install the screws you removed from along the top of the fabric. These screws prevent the fabric from sliding along the channel. If you need to move one of the leg clips now is the time to do it.
After the Reassembly
Now you can take your newly shortened RV awning and test that it works. Make sure that the spring engages and has enough tension to roll the awning up. There should be enough tension that you should not have to assist it but it also should not snap back too quickly either.
If you find the tension is a bit off you might need to take the awning off again and either add another revolution if it doesn’t roll up fully or unwind a revolution if there is too much tension in the spring.
If the fabric gets hung up, you may need to take the assembly apart again and make sure that it stayed seated in the track. If any of the screws have come loose then tighten or replace them.
Potential Dangers
Before you start taking your awning apart and cutting, there are few things that you should know. The springs inside the rolling tube have quite a bit of tension on them. It is very important that the tension is released prior to repairs. If you are not careful, this can cause injury. Make sure that you follow the tips below.
Don’t attempt to remove or install an awning by yourself. Understand what will be required and make sure that you have the skills needed to complete the repair. Most of all, take your time.
If this is something that you cannot handle. Most RV dealerships or even sign shops are able to help with some of these repairs.
So, although you may think that it is a relatively simple task at first, shortening an awning can turn dangerous quickly, so it is crucial that you are prepared properly before tackling this project.
Once you’ve completed shortening your RV awning you might be looking for a much simpler project, like adding lights to your RV awning. This is a quick DIY project to create a little atmosphere on your RV patio.
