This post contains affiliate links.
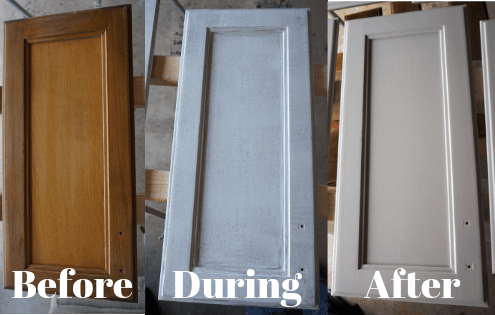
RVs are notorious for having dark, dated, dingy cabinets. Our 1994 Safari Trek was no exception. We wanted to give our cabinets a new lease on life for minimal cost so paint was our best friend.
We took the following steps to refresh our cabinets with paint
- Clean and Degrease
- Repair and Patch
- Sand and Degloss
- Prime – one coat of surface appropriate primer
- Paint – two coats of high-quality semi-gloss
- Clear Coat – recommended but optional
They say painting is 90% prep and 10% painting and I couldn’t agree more. It’s a time-consuming process to get your cabinets ready for paint but it’s well worth the work to have refinished cabinets that will last.
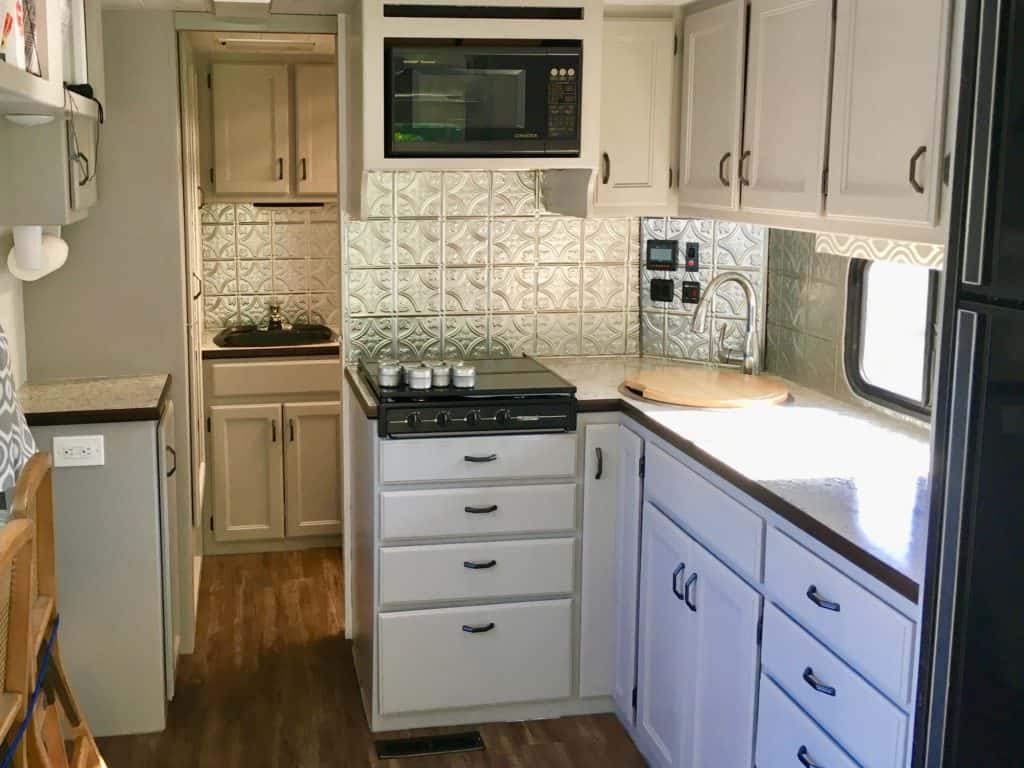

Table of Contents
Getting Started
Before you get started painting your cabinets there are a few you should do to prepare.
First gather all your supplies, you’ll need
- screwdriver (probably a Phillips)
- ziplock bags
- marker
- TSP
- coarse sponge
- several clean soft rags
- wood filler
- small putty knife
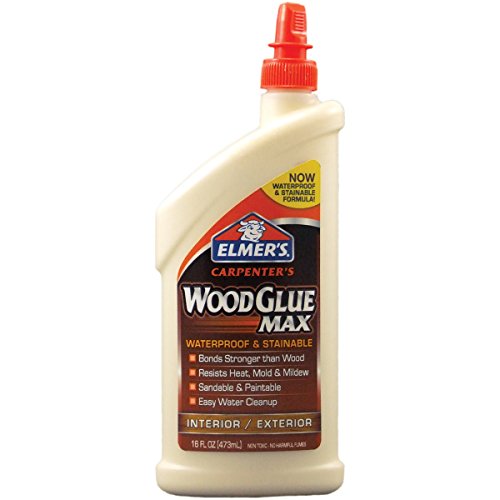
- wood glue (Amazon link)
- clamps
- 180 grit sandpaper
- palm sander (Amazon link)
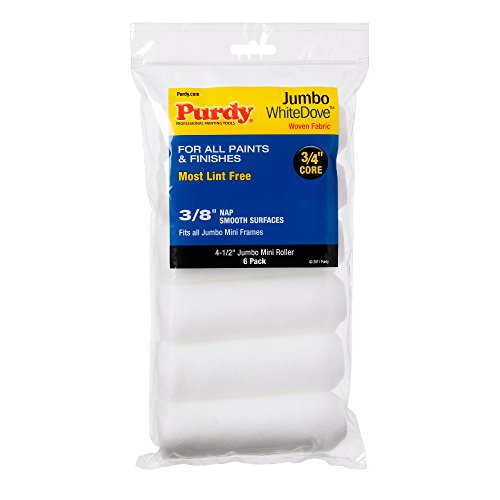
- several quality mini rollers – at least 3
- a high-quality paintbrush – this is my favorite paintbrush
- mini roller tray
- primer
- paint
- clear coat
- foam brush
- 220 grit sandpaper
Once you’ve got all your supplies it’s time to start deconstructing. You’ll start by disconnecting your cabinet doors from the boxes.
It’ll depend a little on the type of hinge you have but most will require you to unscrew the hinge from the box. A Phillips screw is most commonly used.
As you remove the cabinet doors from the boxes you’ll want to label where the doors go. Labeling makes it easier to reinstall your doors in the correct spots once finished.
Labeling is easily done by numbering the box and door in a hidden spot that won’t be covered in paint or by tagging them with a little piece of numbered tape.
Once the doors are removed you’ll need to finish unscrewing the hinges from them. Put all the hinges and screws in a ziplock bag to prevent losing any bits.
Next, remove the drawers from the cabinets. Of course, it’ll depend on the style of drawer slide for how they are removed. Our drawers were center mount slides and had a little catch that needed to be depressed to remove them.
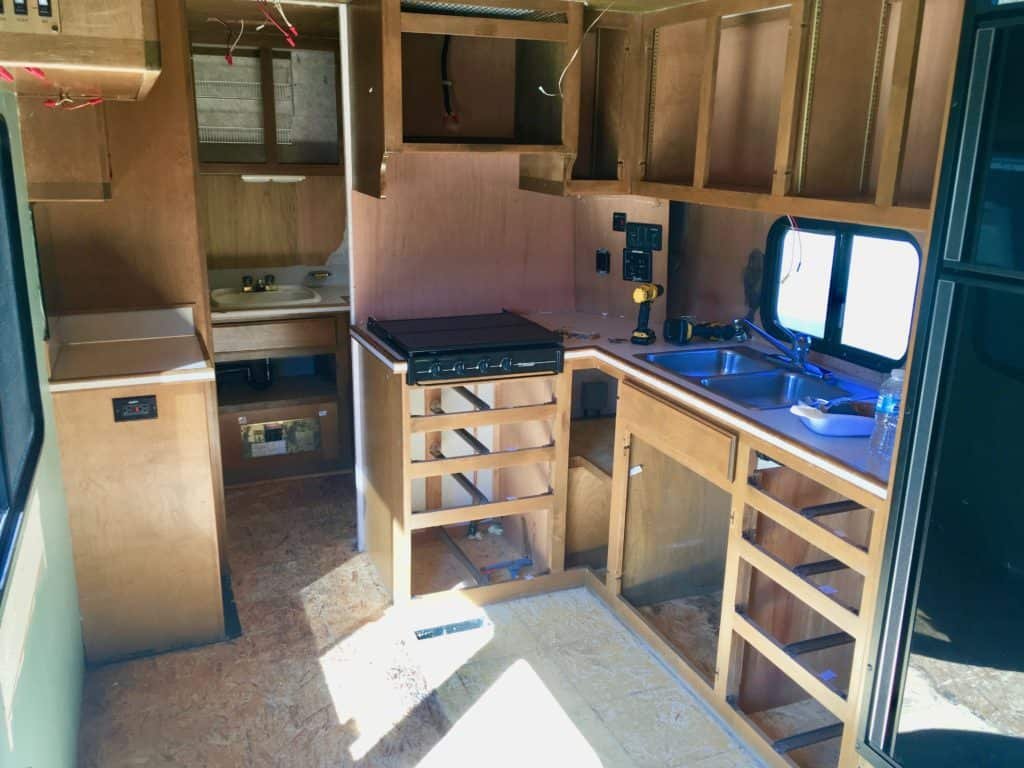
Then you’ll unscrew the handles and knobs from the doors and drawers. Place all the hardware in another ziplock with the screws, if you are reusing them, put in a safe spot, if not you can donate them if they are in good shape or just chuck ’em.
Now that you have the cabinets taken apart you can set the doors up in your painting space. Where ever you choose to set up make sure it is well-ventilated.
We used our garage and set up saw horses with 2x4s on them. Since we were painting in the summer we could have the garage door open to allow proper airflow.
You should also decide if you are painting the inside of your cabinets or not. We chose to so they would look nice and bright. I didn’t want to have beautifully painted cupboards then open the door and see dark brown wood.
Should you choose to paint the insides it is adding a bit of work but it’s totally worth it. You’ll prep and paint the inside of the cabinets the same way you paint the cabinet faces, doors, and drawers.


Step 1: Washing and Degreasing
Now that the setup is complete, it’s time to get to work. To start you’ll need to clean your cabinets up.
I always swear by TSP for cleaning anything before painting. TSP is short for Trisodium Phosphate, it is a chemical cleaner so it should be used with care.
It works great for removing grease and grime and is recommended for cleaning surfaces prior to painting.
Mix up some TSP according to the directions and glove up, it can be irritating to the skin. Grab your rough sponge and start scrubbing down your cabinets with a bit of elbow grease.
Most cabinets shouldn’t be too dirty but pay special attention to the areas around the handles and knobs as well as any cabinet above the stove. You’ll wash down the cabinet faces, drawers, and both sides of all the doors.
Tip: While cleaning, pay extra attention to areas of high hand contact, these will be extra grimy
Once you’ve thoroughly cleaned all the surfaces, grab some fresh water and a clean cloth and wipe everything down again. This will remove any residue from the TSP.

Step 2: Repair and Patch
Now that your cabinets are sparkling clean it’s time to fix them up. Any used RV is sure to have a few scars. Now is the time to patch them up so your paint has a smooth surface to adhere to.
Carefully go over your cabinets and pick out any that need a little help. Little knicks and scratches will be the most common but some might need a little more help.
Give any of the surface blemishes a light sand first to rough the surface up. Then apply some wood filler and smooth it out with the putty knife.
For laminate or veneer cabinets, glue down any areas where the surface is peeling off the plywood or MDF underneath. In areas where the veneer is chipped or missing use wood filler to patch the gap.
If your veneer is in really rough shape you could try to peel it off but this would be very time consuming to do.
If you have any cabinets in need of major repairs now is the time to fix them. I had one cabinet door starting to separate so I stuck some wood glue into the creases and then clamped the door tightly till the glue set.
Tip: Wipe away excess glue before it dries. Dried wood glue is difficult to sand
If you have any cabinets with mirrors or inlaid glass that you wish to replace now would be a good time. We had two cabinet doors in the bathroom with recessed mirrors that I wanted to switch to plain wood.
I carefully unstuck the mirrors from the back of the cabinet using a paint scraper. Then I cut a 1/8″ project board to size and glued and clamped it in place. Once I had sanded the cabinet (in the next step) I used some paintable caulking at the seams to finish it off.
At this point, you need to decide if you are reusing the old hardware or not. If you are, go ahead to step 3, if not you will probably need to patch the holes from the handles.
It’s a good time to at least narrow down your options for what type of hardware you want on your cabinets if you haven’t already done so.
If you already know and have the handles in hand, compare them to the existing holes and see if you can reuse them. Should you need to fill them, follow your wood filler’s directions for deep holes. You will likely need several coats to get them filled properly and smoothly and don’t forget the back of the doors and drawers.
Step 3: Sanding
Sanding has to be my least favorite part of the entire refinishing process. You end up getting everything that you just cleaned, dirty and dusty. The main reason you wash and degrease your cabinets before sanding is to prevent all that dirt and grime from prematurely clogging up your sandpaper.
If you have a small electric palm sander now is the time to break it out. An electric sander will make short work of all your flat surfaces.
Detailed areas will take a bit more time and effort to sand by hand. I found rolling small pieces of sandpaper to work into curved edges got the job done.
Any areas that needed to be glued or filled should be sanded first with coarser grit sandpaper like 120 or 150. Gently sand these spots until smooth and flush with the rest of the surface.
Tip: Sand with the grain of the wood to reduce scratch marks
For the rest of the cabinets, we used 180 grit sandpaper to give all our cabinets a good once over. This is to degloss the surface and get it ready so it’ll take the paint well.
180 grit is fine enough that it won’t leave sandpaper marks but coarse enough to give the paint a little more purchase. Sanding with anything finer isn’t useful since the paint itself will provide a smooth final surface.
Once you are done sanding you need to clean all the dust off of your cabinets. Slightly dampen one of your clean, soft cloths and wipe down all of your cabinets. You want your cloth just a little damp to help pick up the dust if it’s too wet it could damage the wood.
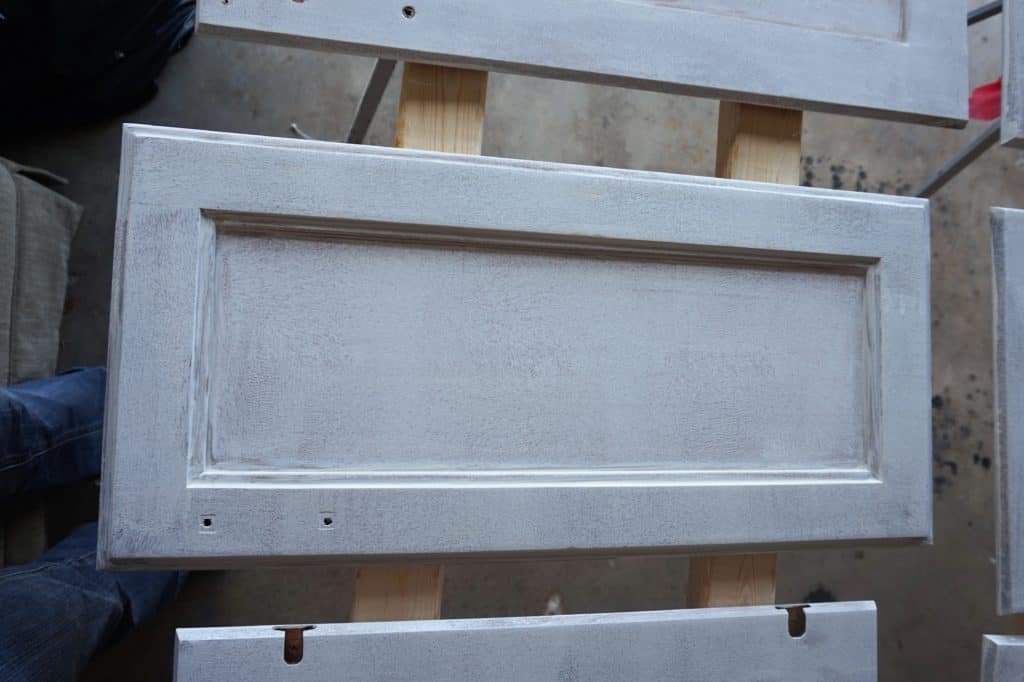
Step 4: Priming
It’s finally time to start painting! Well, priming. It’s important to pick the right primer for your surface.
We were lucky that all our cabinets were made of solid wood so we used a water-based primer. Specifically Kilz Latex primer, sealer, and stain blocker.
Using a stain-blocking primer is important for wood since during the sanding process you may have taken your cabinet down to bare wood. The primer will prevent any bleed through of color from the wood. The primer will also seal any wood filler and bare patches so your paint will roll on evenly.
If you have laminate or veneer cabinets you’ll want to read the directions on your primer very carefully to make sure it will adhere to your surface properly. Many RVers with laminate cabinets swear by Zinsser Oil based primer.
Apparently, this stuff sticks to anything. But it is oil based so prepare to chuck your brushes when you are done or else you’ll need mineral spirits to clean up. And don’t worry, it’s perfectly fine to put latex paint over oil primer, just not the other way around.
Tip: Use the scratch test to see if your primer has adhered properly.
If you aren’t sure you have the right primer, do a test piece then perform the scratch test. Run your fingernail down the surface using medium pressure and see if you can scratch any paint off. If you can you need a different primer if you can’t, sweet, time to prime.
Now some people swear by foam rollers but I am not one. I find they apply a too thin coat and don’t cover very well. I prefer to use a high quality, shed resistant, woven, nap roller that is 1/4″ thick.
We also used a high quality, 2 inch, angled paintbrush with a short handle because I liked the way it felt. These are what we used for painting our cabinets and they turned out beautifully.


It’s up to you what style of roller and paint brush you use just make sure you get ones that are good quality and shed resistant. There is nothing worse than having to pick bits off of your freshly painted surface.
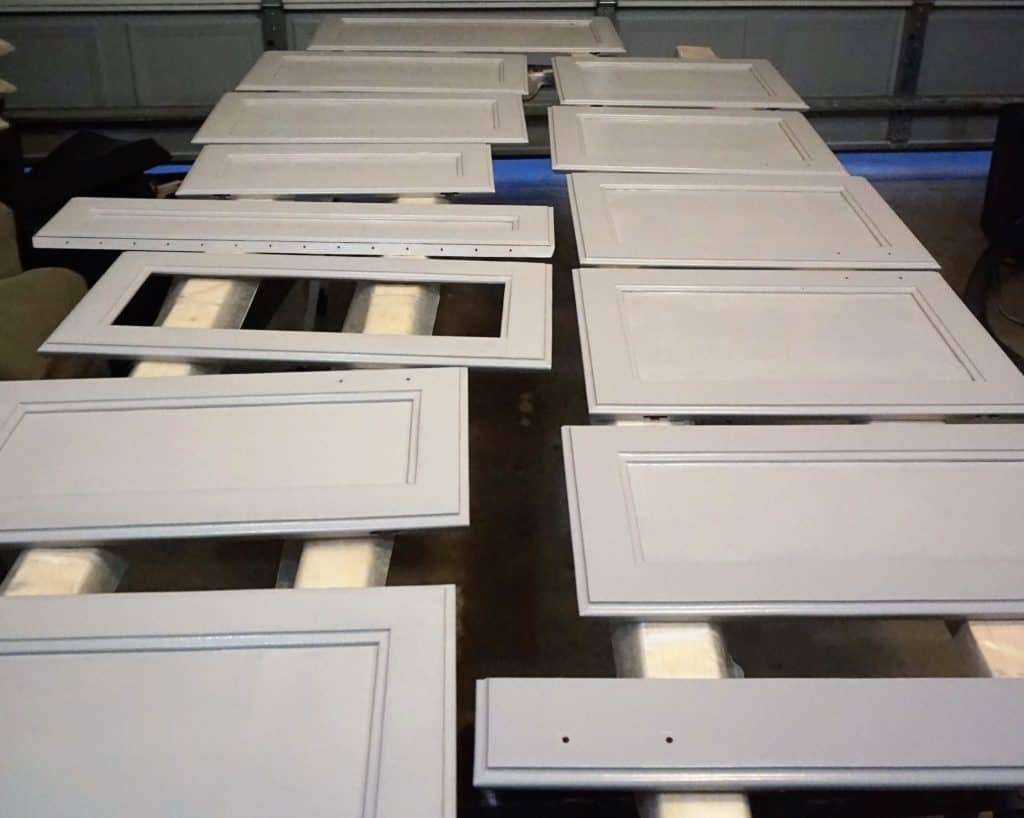
When we set up our doors to paint, we laid them all face down so the inside of the door was exposed. I chose to paint this side first in case of any drips, I could clean off any globs before painting the fronts. I also covered my 2x4s with wax paper, this prevented my doors from sticking once they were flipped over.
Beau and I worked as a team, I went ahead of him using the paintbrush in any nooks, crannies, and corners and he came behind with the roller to cover the larger flat surfaces.
Once all the backsides of the doors were done we let them dry overnight then flipped them over to paint the fronts following the same process. While the doors and drawers were drying we primed all the cabinet faces in the RV as well as inside of the cupboards.
Step 5: Painting
Now onto the fun part, PAINT! I always find after priming, the cabinets look worse than before but that’s just because primer is always so streaky.
We chose to paint our cupboards a soft, medium tone grey. We also used a plain bright white for the interior of the cupboards but just used what we had leftover from the walls.
If you aren’t sure about your color, then painting a test door is a great idea. You don’t want to go to the trouble of painting all your cabinets just to decide you don’t like them, then, have to repaint them.
Picking a high-quality paint that is meant for cabinets is a good idea so you know all this work you are doing will last. We used Behr Marquee Interior Semi-Gloss Enamel, which is a latex paint. I’ve also used SICO Furniture and Cabinet Melamine finish paint on another kitchen project and it has stood up amazingly.
Semi-gloss or a similar finish with a high sheen is good for high traffic areas like a kitchen since it is much more friendly to being wiped down and cleaned.
In general, we followed a very similar process to the primer. Like with the primer, we started with the back sides of the cabinets doors let it dry then painted the fronts.
We applied two coats of paint to all the surfaces even though our paint was supposed to be one coat coverage. I have never found one coat coverage paints to cover in one coat, but they do an amazing job of covering.
Tip: Keep your roller and paint brush in the fridge, wrapped in plastic to prevent drying out between coats
I’ve always wrapped my wet roll and paintbrush in plastic and kept them in the fridge in between coats to prevent them from drying out. This cuts down on the work of cleaning out my roller and brush. If you are going to be away from your painting for more than a day or two, stick them in the freezer but be sure to let them defrost before continuing painting.
Once you’ve finished painting all your cabinet faces, doors and drawers you are going to want to let them cure a bit before sealing and reinstalling. How long they need will depend on the paint but a couple of days should be good if you are sealing them if you aren’t, then leaving them for a week would be ideal.
We personally chose to roll on our paint and primer because we didn’t want to deal with the mess of a paint sprayer. But you can spray paint your cabinets with no problem. If you don’t have a paint sprayer, cans of spray paint will cost you more than a gallon of roll on paint.
You can get a smoother finish with spray paint but it does take some practice to develop a good technique. That being said I think our cabinets turned out pretty smooth with a roller.
Step 6: Clear Coat
I’m going to start off by saying we did not clear coat our cabinets. I’m not a hundred percent sure we made the right decision, or even why we opted to not, but only time will tell.
If you decide to clear coat your cabinets there are a few options available you can use wax, a water-based sealer or oil-based sealer.
Wax is usually used with chalk paints to seal them. Some people swear by wax to finish everything but most don’t recommend using it in high traffic, high moisture, and high heat areas, like a kitchen, bathroom, or RV.
Tip: Use a waterbased sealer on light colors to prevent yellowing.
A better alternative is a water-based sealer. Water-based sealers are easier to clean up than oil-based and tend to not yellow over time like an oil based sealer.
Oil-based will be the most durable option you can buy but you will have to make the call if the extra clean up is worth it to you or not.
Most sealers require 2 or 3 coats with a light sanding of very fine grit sandpaper in between. I prefer to use a foam brush for applying a clear coat since I don’t have to worry about brush marks and I can throw out my brush when finished.
So there you have it, the steps we took to refinish our RVs cabinets. It was a lot of work but didn’t cost too much and the final product is stunning! Check out our articles to see how our cabinets look in our fully renovated kitchen and bathroom.
Cabinet Painting Products

Fix It Yourself RV Maintenance Course
The most costly parts of RV ownership are repairs and maintenance. That’s why I recommend learning to do your own RV repair and maintenance.
The Fix It Yourself RV Maintenance Course is the perfect way to learn how to do the most common repairs and maintenance on your RV. A Certified RV Technician wrote and filmed the course so you know the information is actually correct.
Plus it’s downloadable so you can access it from anywhere, even when boondocking in the middle of nowhere with no service.
Find out more about the best RV Maintenance and Repair Course available!