This post contains affiliate links.

RV’s come in all shapes, sizes, and ages. Picking up a used RV is a great way to get into a rig without breaking the bank but they tend to leave something to be desired when it comes to style and comfort.
Fortunately, there are many ways to upgrade your RV to the 21st century. Some cost more and are complex while others are simple and cheap.
I’ve put together below 21 actual upgrades we personally implemented into our own 1994 Class A to bring it up to our high standards and make it into a place we are proud to call home.

Table of Contents
1) Upgrade Your Mattress
This upgrade won’t be seen by anyone but it’ll sure make a huge difference to you when you lay down at night. We spend a 1/3 of our lives in bed so why not enjoy snuggling up at night on a new mattress.
Investing in a new mattress will give you peace of mind that you have a clean spot to sleep especially if you purchased a used rig. The mattress our RV came with was awful. It was uncomfortable and came with bonus mystery stains.
Now before you run out and buy a brand new Serta beauty rest, extra plush, king-sized mattress you need to measure you’re old mattress and bed space to see what will actually fit there. RV mattresses are typically a different size than standard mattresses.
Unfortunately, with special sizes come special prices too. If a brand new mattress just isn’t in the budget right now and your mattress isn’t in terrible condition then a high-quality mattress topper can give it a whole new lease on life.
We picked up a 2-inch memory foam mattress off Amazon and it made even a crappy air mattress comfortable enough to live on for 6 months!
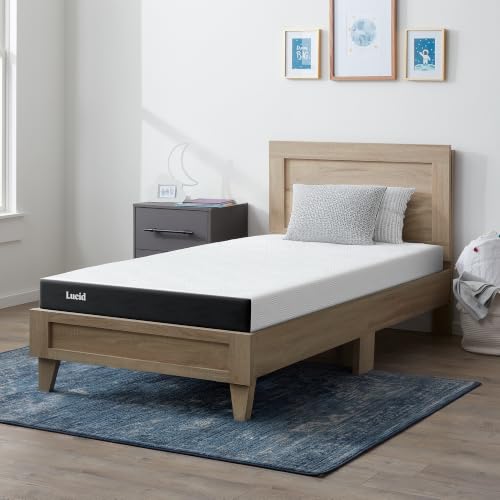
- SHIPS IN A BOX AND ARRIVES COMPRESSED: Your memory foam mattress is compressed, rolled, and shipped in a box right to your doorstep;...
- LOW PROFILE DESIGN: This all-foam mattress has layers that contour to your shape and help align the spine for pressure relieving comfort...
- RELIABLE AND QUALITY COMFORT: independently certified to meet rigorous quality standards, this mattress has a 10-year limited warranty and...
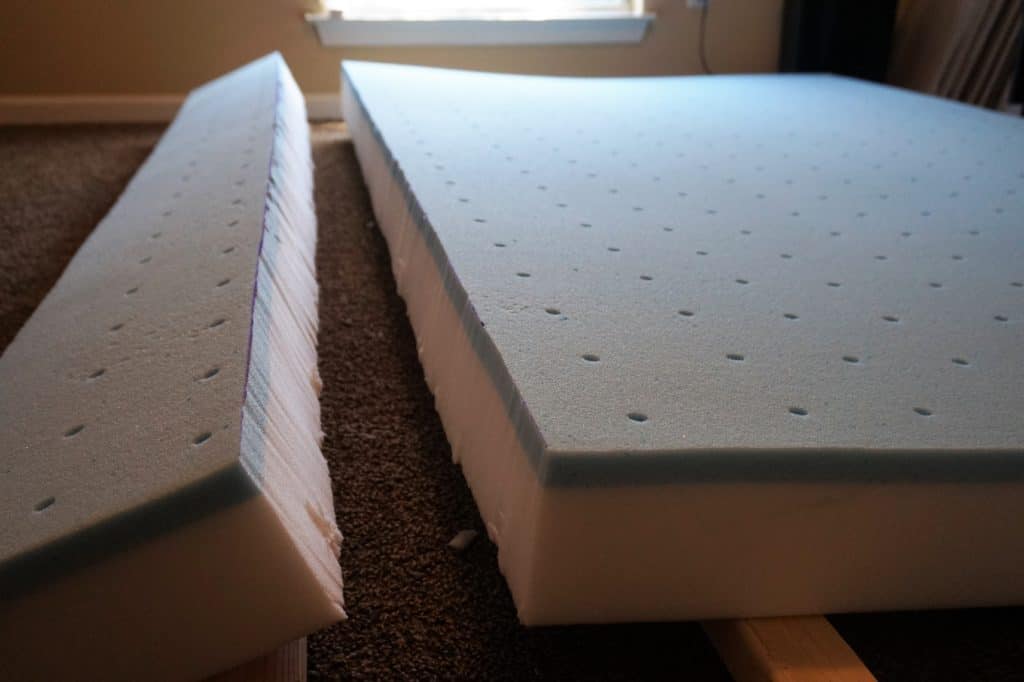
Another option is to buy a good foam mattress and cut it to size. This is the route we took since our bed frame could only take a relatively thin mattress but we did add a mattress topper as well to really bring it up a notch.
Foam mattresses can be easily cut with a serrated knife. If you have an electric carving knife it’ll make quick work of your mattress butchering. I warn you, it will make a huge mess so have someone follow with the vacuum to help contain it. Just make sure you measure twice and cut once!
2) Add Personal Touches
Decorating is hands down the simplest and cheapest way to make your RV pop. Adding photos to the walls and a few small touches can make a space feel like your own.
The easiest way to hang photos up is with velcro. Simply stick one side to the wall and one side to your frames and voila! A simple way to hang photos. This method keeps the frames flush on the wall and also lets you easily take them down to swap photos.
If you have some sort of wall hanging then Command Hooks are the best option out there. I recommend getting the actual 3M brand since I find they have the best adhesive compared to dollar store ones. They also can be removed without making a mess of your walls.
Plants are another great way to make your RV feel like home. Plus they have the added benefit of keeping the air a little cleaner! Just keep in mind you can’t bring plants (more specifically soil) across the border. So if you have plans to go back and forth between Canada and the US maybe get a plant sitter instead.


3) Paint the Walls
Paint is the great leveler! It’s an inexpensive and easy way to hide a multitude of sins. It can take a 90’s scrub green motorhome and turn it into a crisp, modern grey oasis. Armed with a roller and paintbrush you can cover just about any poor design decision you or the previous owner made.
Heavy duty primers help to cover the walls previous offenses and prevent bleed through of the unknown surface stains beneath. If your walls aren’t perfectly smooth or you are looking to add a little something more there are many painting techniques out there you can try your hand at. Plus since there isn’t a ton of wall space in an RV you can experiment a little, worst case scenario you just roll a new coat overtop.

- These 9 Inch sponge painting rollers is the quickest and easiest way to sponge paint!
- Use with Faux Finish Glaze for a decorative sponge painted wall finish.
- You control the faux finish paint finish results! Sponge roll to your desired look.
Our walls weren’t without their imperfections so I chose to sponge paint them. I started off by painting the walls white then used a very pale grey, a shade lighter than our kitchen cabinets, and sponged it on with a seafoam sponge. These sponges give the best results without being too uniform.
With all the furniture installed, you don’t actually see a whole lot of the walls but I love how they turned out and that it’s not just stark white.
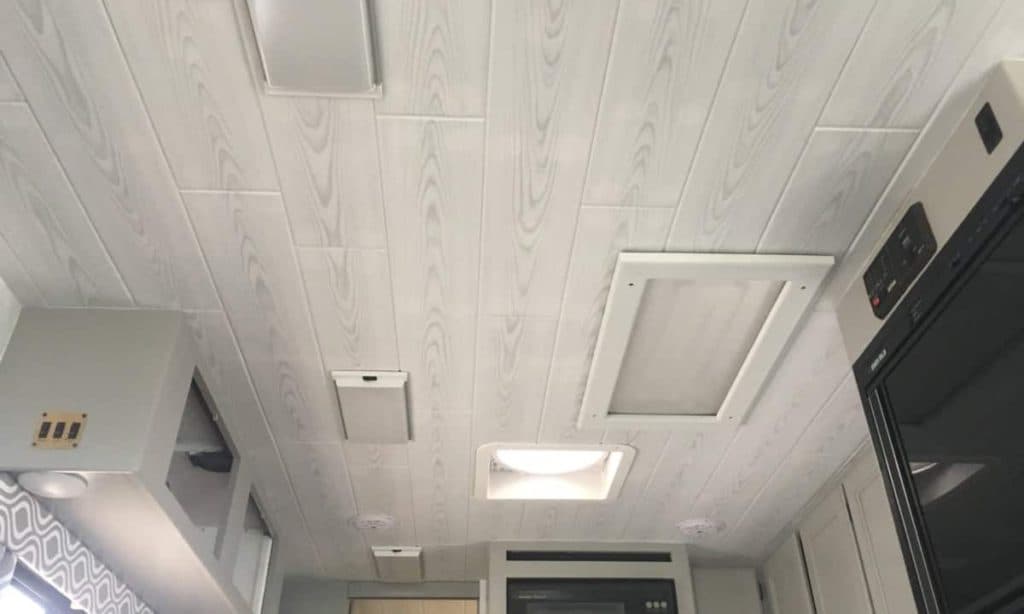
4) Update the Ceiling
Ceilings have a tendance to be overlooked but when your ceiling is lower, like in an RV, and is covered in stained, off-pink carpet it’s hard to ignore. There are so many options out there to redo your RV’s ceiling that the sky’s the limit.
Paint is probably one of the cheapest ways to upgrade your ceiling but it’ll depend on how easily the old surface was removed. Wallpaper and fabric are a couple of more labor intensive options. If you are feeling stumped on what to do with your ceiling, check out my article giving you 13 Unique Ideas to Update Your RV Ceiling.
We found an amazing styrofoam faux wood ceiling plank that has to be the easiest thing I have ever installed! You can read about how we updated our RV ceiling in our article Easy, Lightweight RV Ceiling Update
5) Change the Lights
No one likes a dark space and the lighting in older RVs is notoriously terrible and energy inefficient. In our RV, we suffered from mini fluorescent lights, brass fixtures, and nonexistent under-cabinet lighting. Fortunately, Amazon and some ingenuity on Beau’s part came to our rescue.
Changing all the light fixtures over to LEDs will save you a ton of watts, perfect for reducing the load on your batteries while boondocking and keeping everything well lit. Amazon has a million and one options for everything under the sun and 12V LED light fixtures are no exception. We picked up several small LED fixtures for a song to replace our brass eyesores.
If you happen to like your lights then it very easy to swap out the old bulb for a new LED bulb. They are very cheap and come in pretty much any size you need.
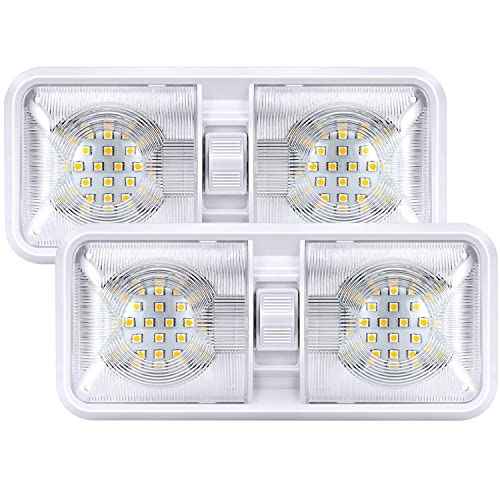
- HIGH QUALITY and RELIABLE PERFORMANCE: The Kohree double dome light is made of superior quality heat-resistant material, which is CE and...
- EASY INSTALLATION: The Kohree camper ceiling light has 2 two wires without polarity and comes with nuts and screws to hold it in place...
- CONVENIENT ON/OFF SWITCHES: Built-in 3-way switch that enables you to use one side or both sides of the light independently. The Kohree 12V...
For our mini fluorescent lights, we couldn’t get replacement bulbs and didn’t want to keep them as is. Beau gutted the lights then installed some LED tape strips inside the housing and soldered them to the original switch. They work like new now and if you have some minor experience soldering they weren’t too hard to rig up.
Under-cabinet lighting is an easy fix too with the LED tape lights. Just stick them to the underside of your cabinets, wire them up and you are ready to go. See our Renovation Materials page to find out which ones we purchased.
You can also add LED strip lights to your RV awning for some great outside ambiance. Read our full how-to article for a step-by-step guide.
6) Install New Floors
Flooring can be an inexpensive and simple upgrade or it can be complex and expensive. It all depends on your tastes and layout.
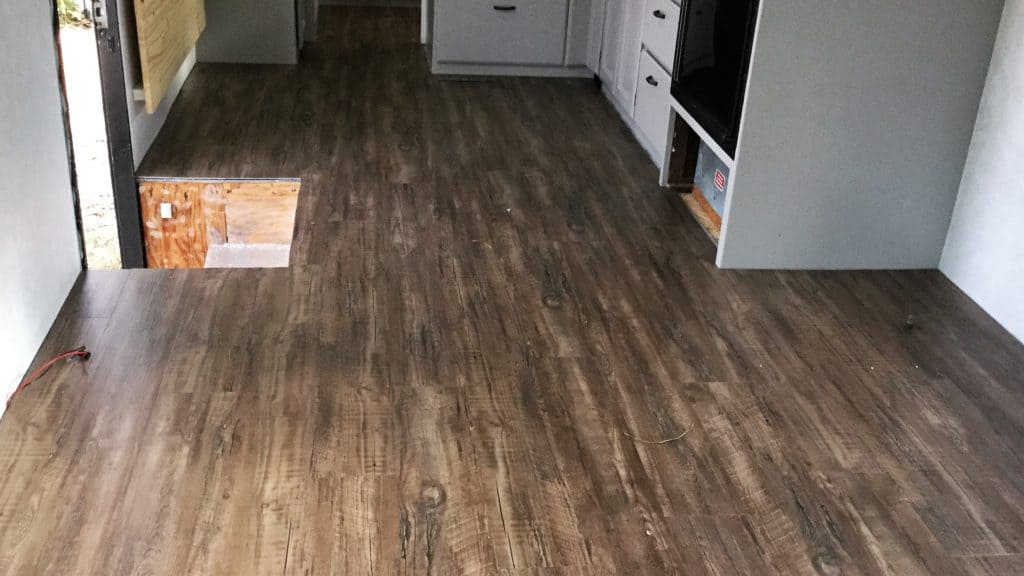
Ripping out old sticky tile and gross stained carpet is a dirty job but oh so satisfying. Installing new flooring can be tricky since RVs have all kinds of nooks and crannies you’ll need to cut around. I don’t think we had a single row where we didn’t need to make some oddball cut.
If you don’t have the tools or the inclination then this is a job you can easily hire out to your local jack-of-all-trades. But generally, it isn’t overly complicated to install new floors depending on the type you pick.
I wouldn’t recommend true hardwood in your RV for several reasons: large temperature swings and changes in humidity will cause it to warp; it’s fairly heavy; installation is much more labor intensive; it won’t stand up to water well.
My personal recommendation is vinyl flooring. Vinyl has come a long way from the crap in our parent’s old kitchen. Many patterns look very close to wood especially if you get a plank style. Vinyl has the added benefit of not being susceptible to temperatures and moisture. It can get wet and dry out with no issues.
Vinyl comes in a range of patterns, prices, and installation types so finding the right floor to suit you, your budget and your RV is fairly easy.
7) Replace the Backsplash
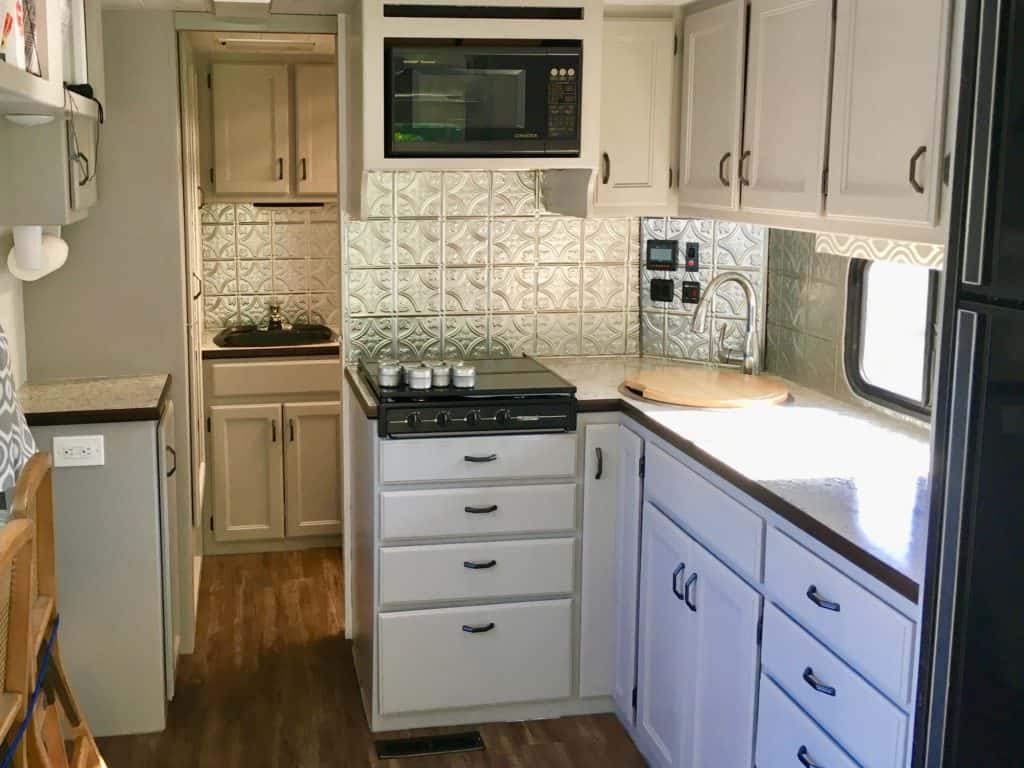
The kitchen backsplash is the key to tying everything together. Without the right backsplash, your kitchen or bathroom can look unfinished. Our former backsplash was an early 90’s wallpaper border, it had to go!
In a small space like an RV, the backsplash becomes a real focal point. Fortunately, there are many very simple ideas for creating a fabulous backsplash focal.
Since ceramic tiles and mortar are not the most practical to use in an RV faux options like Smart Tiles are much more convenient and way easier to install. They actually look very realistic too!
Faux tin tile or other patterned thermoplastic panel make quick work of updating your backsplash. They are lightweight, paintable, easy to cut and are installed using heavy duty two-sided tape.
We opted for real tin tile. We cut it to size, clear coated it then installed it with heavy-duty glue, like No More Nails. It was a little harder to work with than it’s plastic counterpart but it was quite a bit cheaper.
See our Renovation Materials page to find out where we bought our tin tiles.
8) Countertop Upgrade
Upgrading the countertop in your RV is a great way to personalize your kitchen without too much work. Paint is probably the cheapest and simplest way to get the most bang for your buck.
There are many great products out there to paint your countertop. Countertop refinishing kits come with all the pieces you need to redo your counter. Most involve painting a solid base, sponge painting it to look like granite then sealing with an epoxy topcoat.
It’s an inexpensive way to spruce up your kitchen and you don’t need too many tools. But if painting isn’t your thing or your counter isn’t totally salvageable or you are like us and are relocating your sink, well there are some other options.
We picked up a new sheet of laminate from the local hardware store, cut it to size, glued it down then finished the edges with some pine trim we stained and sealed. Overall it was inexpensive and fairly easy to do. To get the full play by play of our install read our article The Cheap Durable Way to Update Your RV Counter.

9) Cupboard Upgrades
Paint is back again as the fixer of all design evils. Painting your kitchen cabinets is a cheap way to upgrade them but it is labor intensive.
Woodfiller is your best friend if your cabinets are a little worse for the wear. A little bit will go a long way to patching dents and scratches so your paint will roll on nice and smooth.
Don’t forget to sand and prime though. You don’t want all your hard work to get scratched off the first time you open a drawer. For a step by step guide you can read our article on Painting RV Cabinets: A Step by Step Guide with Tips.
If you don’t have the time or the inclination to go to the effort of painting your kitchen cabinets then just upgrading the pulls and handles can go a long way to modernizing a dated design. Even a little spray paint on your existing pulls can kick it up a notch.
10) Replace Your Sound System
What’s a road trip without some music?! Upgrading your RVs stock sound system is an amazing way to enjoy the drive rocking out to your favorite tunes or soaking up an amazing audiobook.
Don’t forget the speakers in the living area too! You’ll want to enjoy music or a podcast while cooking dinner as well. We installed new speakers throughout the RV and even have a switch to swap between the living room speakers and the cab speakers.
Upgrading the deck in the cab to one with Bluetooth will keep you wireless and handsfree. If you can’t or don’t want to change out the sound system but still want to go wireless, you can pick up an inexpensive Bluetooth transmitter that connects to your auxiliary plug.
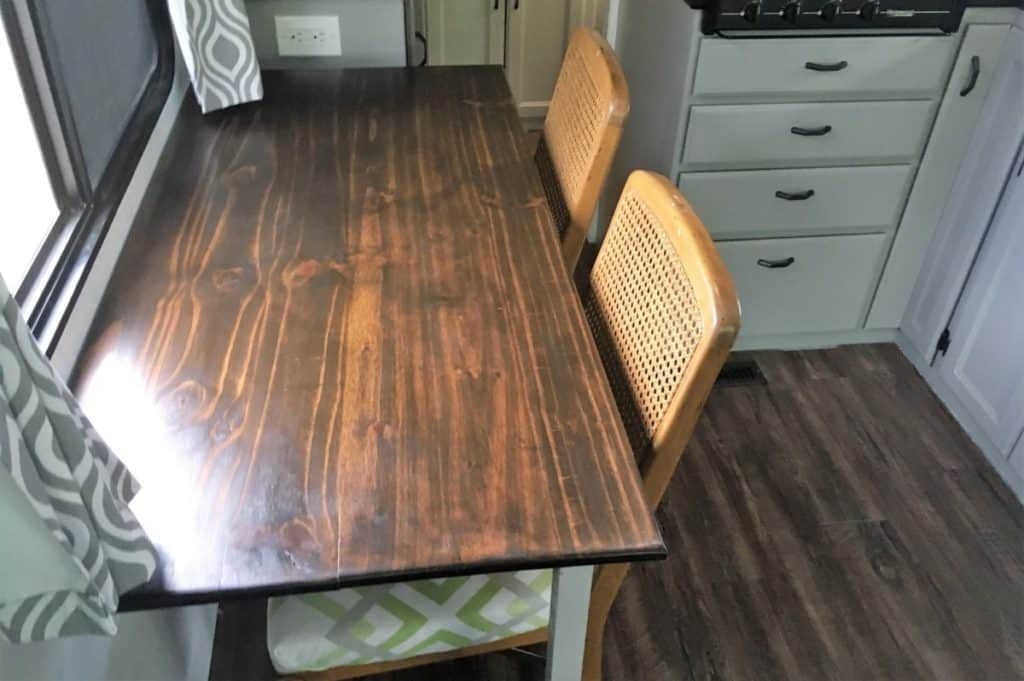
11) Replace the Dining Table
Most people hate the dinette in their RV. They are awkward, clunky and ugly. While it’s useful that they typically convert to a bed, those beds are frequently uncomfortable.
So ditch the dinette and install something that is better suited to your needs. You can add in a workspace, lounge chairs or a new table and chairs.
While we didn’t have a traditional dinette we had an ugly and awkward table that took up way too much room. So out it went and instead we installed a folding table. It was an easy custom job that seats the two of us comfortably side by side. We get to enjoy the view out the window and can still squeeze by to get to the bathroom.
12) Add Storage
Storage is the most coveted thing in an RV. So adding storage and organization where ever you can is going to be the most useful upgrade you can do.
This can be as simple as adding hanging shelves inside the closet or stackable bins under the couch or installing new storage furniture.
We added the Ikea Trofast storage unit to one wall in our RV and it massively increased the available storage space! We also added elastics to help keep the bins in place when rounding corners although we are considering upgrading them to something a little securer.
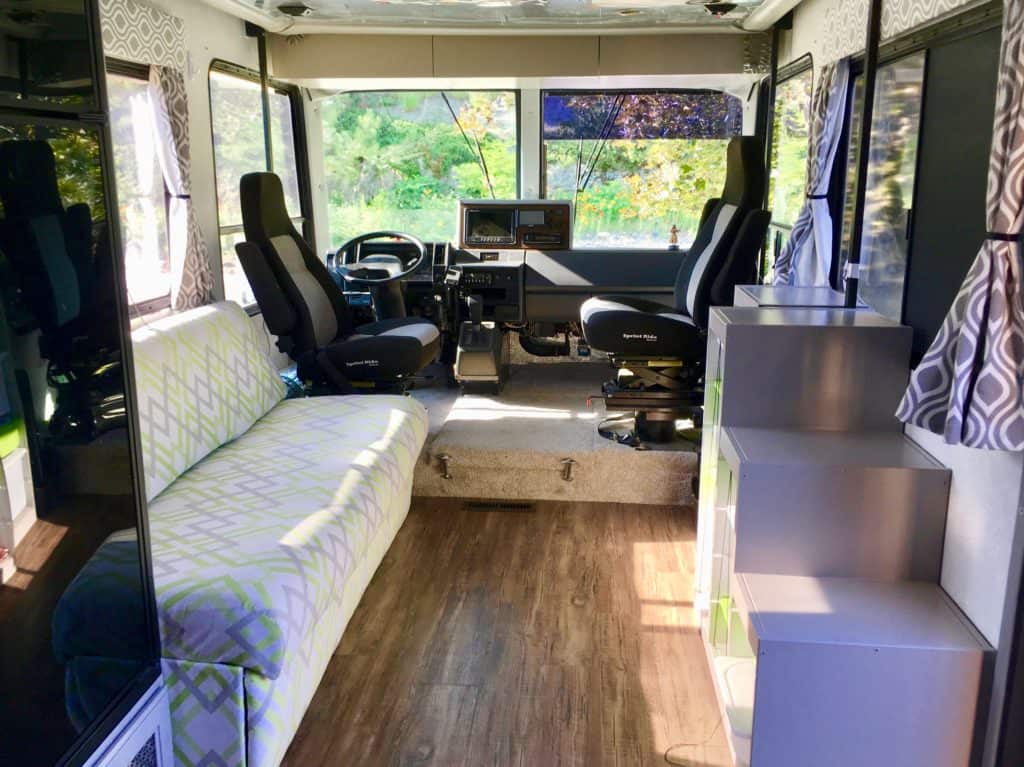
13) Recover the Couch
Couches in RV’s can be pretty hideous with dated flowery fabric. If you can afford it then you can source a brand new couch for your RV online. Heck, you can even install a non-RV-specific couch. I personally don’t trust furniture that isn’t meant to be bolted down my motorhome, but in a travel trailer or 5th wheel is a different story though since you aren’t riding shotgun next to an Ikea couch.
If a new couch isn’t in the budget then you can recover your existing one. If you have some skill with a sewing machine and a lot of patience you can put together a new cover for your couch. You can also hire it out but that may get pricey since it is labor intensive.
I’m not going to say it’s easy or quick but it can be cheap if you do it yourself. I recovered our jack-knife couch in our RV since I didn’t want to lose the extra bed or a safe place for added seat belts.
I love how our couch turned out but it was time-consuming. We added an extra layer of foam to perk the cushions up then I made a template from the old fabric and test fit it on the couch. Then I made the real cover and still had to do a few adjustments. It wasn’t exactly difficult but it sure took a lot of trial and error.
14) Updated Window Treatments
Upgrading your window treatments to blackout shades is a must in your RV! Nothing is worse than spotlights at a campground infiltrating your cozy bedroom.
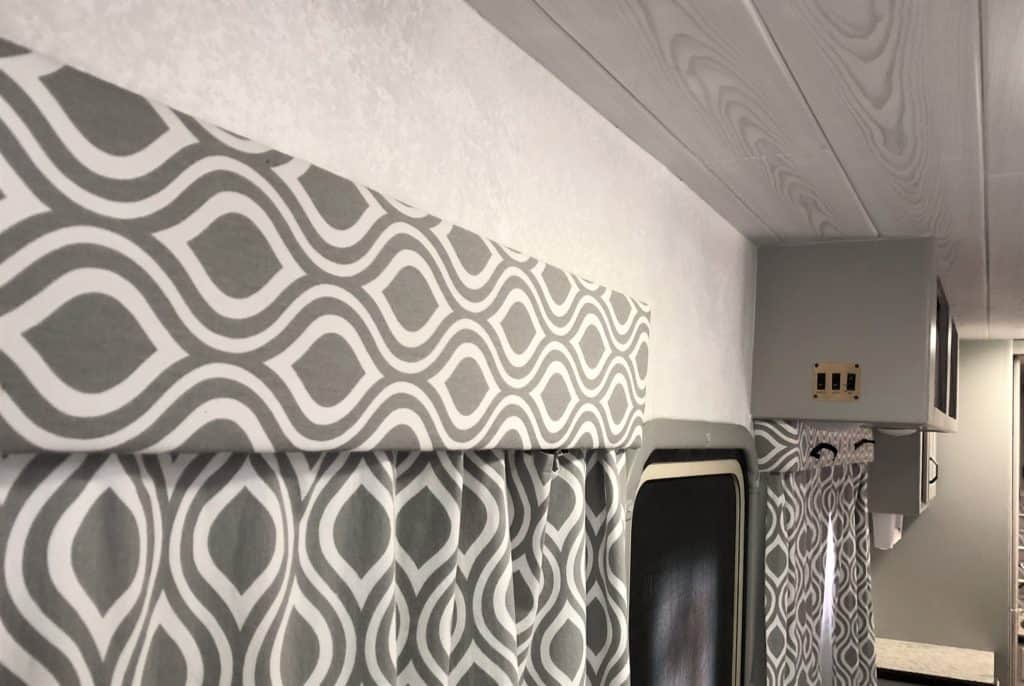
While you are at it you might as well go for something fun and funky to really make your windows pop. We chose to keep our valences and recover them with an awesome grey and white patterned fabric. I used the same fabric to make the curtains and lined them with blackout fabric.
If valences aren’t your thing installing simple roller blinds are another option or you can get RV specific blinds that have a privacy mode and a blackout mode depending on how much you retract them.
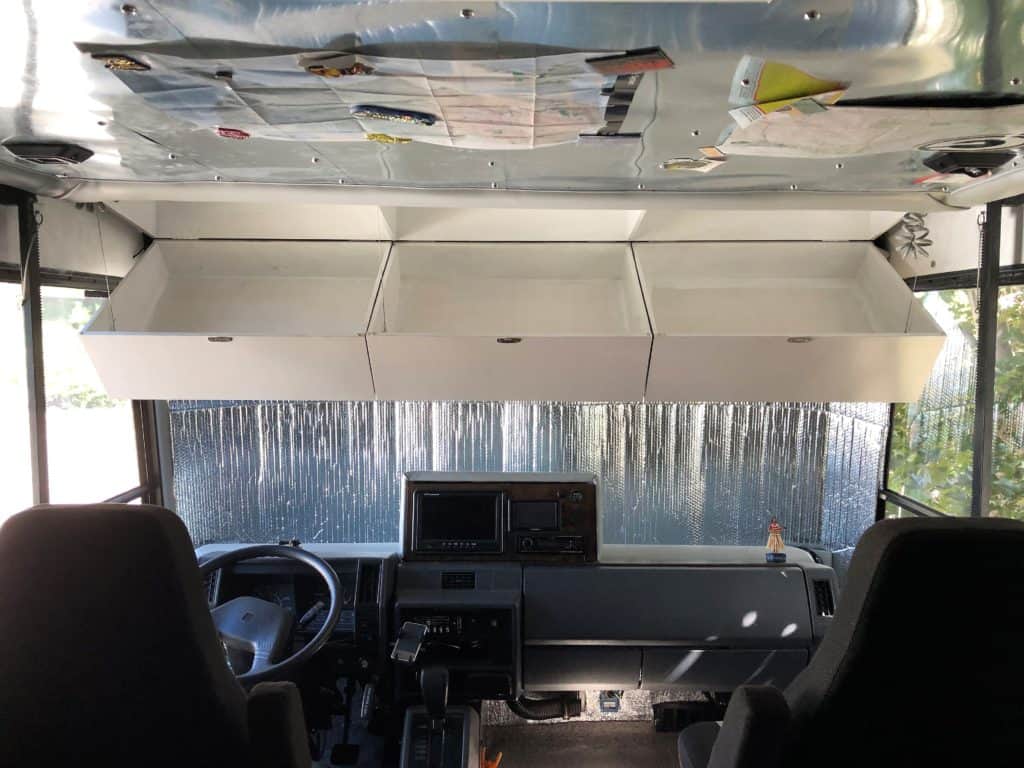
15) Install Custom Cabinets
I’m not sure who in the ’90s thought it was a good idea to install a tube tv over the cab in an RV. Talk about dangerous! Ripping out the TV cabinet was a must for us and we needed to make that storage space much more useable. Plus we needed to replace some of the ceiling panels due to an old leak.
Beau came up with a cool design similar to the overhead bins in an aircraft, that was his inspiration. He built by hand three custom overhead bins out of high-quality birch plywood. They look amazing and have added so much more functionality to the space.
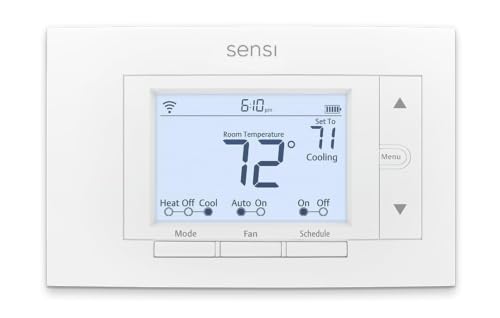
16) Install a Digital Thermostat
Analog thermostats are notoriously inaccurate and also very ugly. Typically the thermostat is only used to control your heater it’s not going to provide you with good data on how hot or cold your RV actually is.
Swapping your old thermostat to a digital one it a fairly straightforward process and will give you much more accurate temperature readings. You don’t have to get a complicated thermostat so don’t invest in a wifi one. Just one that tells you the temperature, lets you set the temperature and lets you turn the heat on and off will be more than sufficient.
- PRIVACY PROTECTION*: Sensi won’t sell your personal information to third parties
- EASY DIY INSTALLATION: Use the built-in level and step-by-step app instructions for a quick installation. Works with HVAC equipment found in...
- SAVE ABOUT 23% ON HVAC ENERGY*: The ENERGY STAR-certified Sensi smart thermostat can help you save energy with features like flexible...
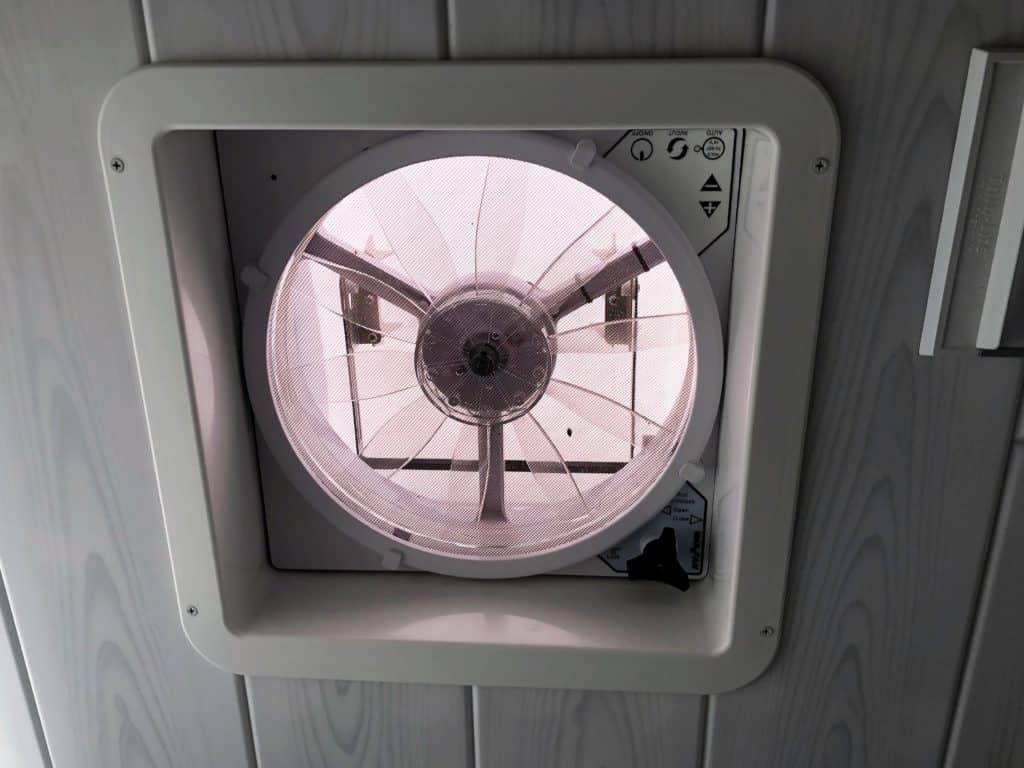
17) Upgrade Roof Vents and Fans
Replacing your existing roof vents with new high powered fans will help to keep you so much cooler when it’s hot out! They also help to disperse cooking smells and create a nice cross breeze.
We replaced all three of our roof vents but unfortunately could only install two with fans due to a lack of electrical above the bed. But turning on one fan and opening the vent above the bed creates great cross flow.
I highly recommend investing in vent covers too. These allow you to open your vents while it’s raining out so you can keep the air flowing without worrying about rain coming it. They are also great at night since you can leave the vent open and not have to scramble out of bed to close them when a middle of the night downpour occurs.
See our Renovation Materials page to find out which ones we purchased and why.
18) Install Rear and Side Cameras
These days almost all vehicles come equipped with a backup camera and nowhere is it more useful to have extra eyes than when you are driving a beastly large RV.
If your rig didn’t come with a rear camera or side view cameras or yours have given up the ghost on you and the dealer wants your firstborn to change them, you can do it yourself for pretty cheap.
We picked up a backup camera and two side mirror cameras off Amazon for a song as well as a display screen that Beau installed in a custom dash console. You can check out the command console in his article RV Cockpit Renovation – Customized Design
The side camera installs involved drilling holes in our side mirrors as well as holes through the exterior of the RV to run the wires inside. The backup camera we were able to tie into the existing wiring for the old non-functional backup camera (yes our 1994 RV had a backup camera that somehow displayed on a tube tv)
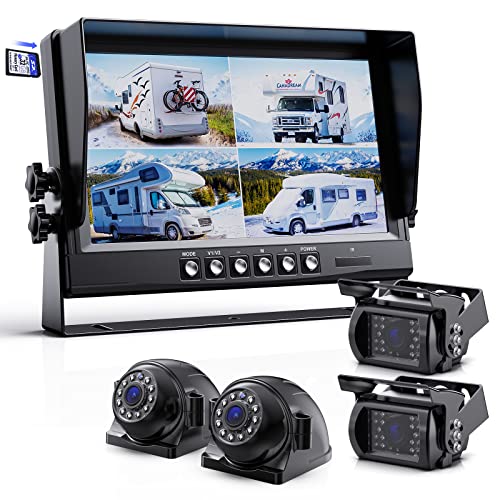
- Larger 9 inch Split Screen Monitor:Our 9-inch monitor with 1920x1080 pixels features with 4 Split Screen, allows you see 4 cameras at the...
- Built-in DVR System: Supports 4 cameras for simultaneous recording and loop recording, which will become your driving evidence if necessary....
- Excellent Night Vision & 4 Split: Reversing camera with infrared lights and multi-layer glass lens to get clear images in the dark, 4 split...
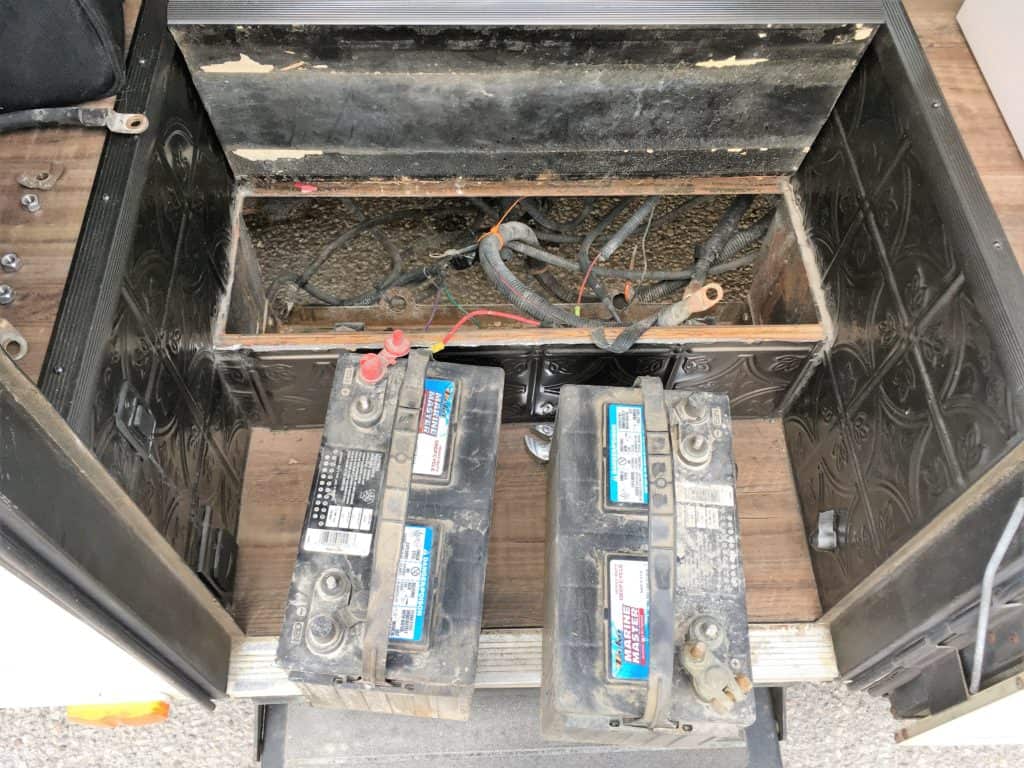
19) Get New Batteries
Getting your batteries checked before you go on the road will give you time to shop around for the best deal if you need new ones so you won’t be caught unawares on your next camping trip.
Your RV house batteries are the heart of your RV. They keep the lights on, the fridge running and most importantly your phone charged. You’ll want to get your batteries tested now and then to make sure they are still running in tip-top shape. You can do this for free at most automotive stores.
You don’t want to be caught with dead batteries in almost freezing temperatures in Yellowstone National Park in mid-June with no cell service and no heat since the fan won’t run on the furnace (true story).
20) Get New Tires
Tires are not nearly as glamorous as new flooring and counters but they are probably the most important thing to upgrade in your RV. Unfortunately, they are probably one of the most expensive upgrades.
Tires typically have a life span of about 6 years. You likely won’t see the same sort of treadwear that you would on car tires since most people don’t drive their RV that much.
Age is the best gauge for knowing when to replace your tires. If you purchased a used RV you likely won’t know the age of the tires unless you were able to get the receipt off the previous owner.
It’s a good idea to just go ahead and replace your tires before setting out on an epic journey. If you don’t you might wind up like us with a blown tire on the side of the road with no cell service (another true story)!
Replacing your tires ahead of time is not only safer, but it’ll cost you much less than a tire brought to you roadside. New tires will also make your ride much smoother and more comfortable and thereby reducing driver fatigue.
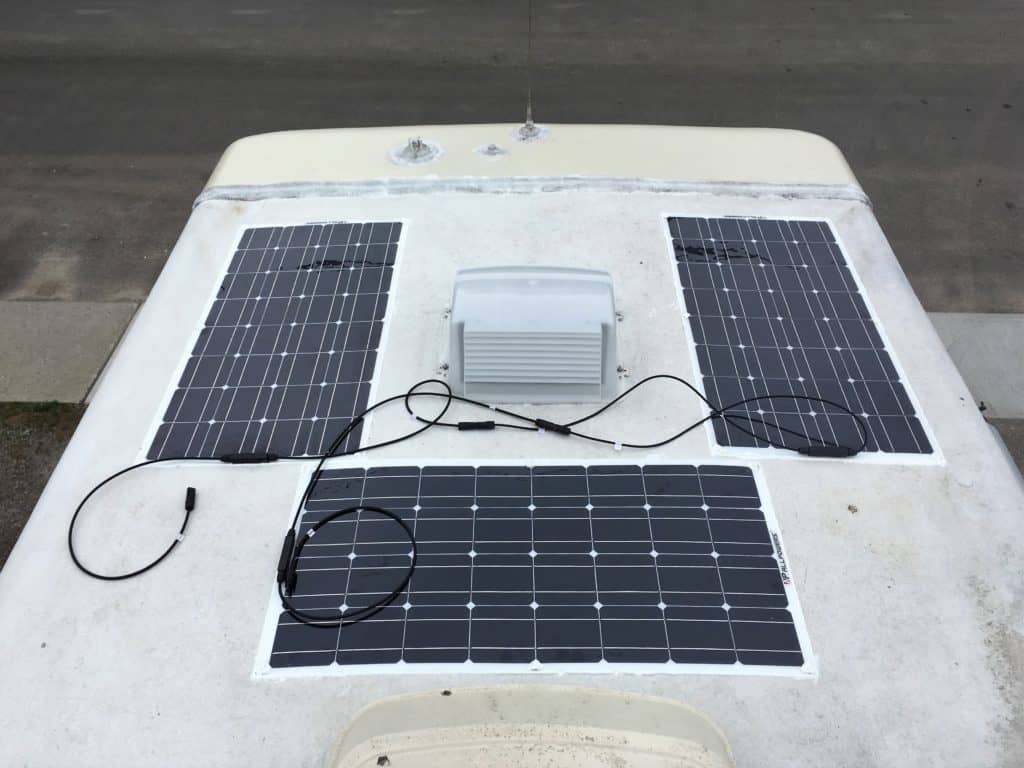
21) Install a Solar System
Adding solar panels to your RV greatly reduces your reliance on RV park hookups. Of all the upgrade installing a solar system is the most complex and one of the most expensive (tires probably win that title).
You can definitely do it yourself but there are people you can hire it out too, though this will add to the cost. In the long run, it’ll probably save you money by giving you the ability to boondock for longer and not be a slave to a power cable or generator.
Our solar setup lets us boondock frequently without having to use our generator even when our batteries were on the fritz. It even let us use our coffee grinder!
We initially picked up 3 solar panels off eBay but they were junk from China that were miswired. We sent them back and eBay refunded us our money so be careful where you buy from.
We ended up sourcing our panels and charge controller from Amazon (like basically everything else in the RV). And Beau was able to install it all with a little help from our friend Youtube.
Check out our Complete Step-by-Step Guide to Installing RV Solar and see what equipment we used and how you can do it yourself!
These are just some of the upgrades we did ourselves in our RV. Doing RV renovations yourself can save you a ton of money but one of the most costly parts of RV ownership is repair. That’s why I recommend learning to do your own RV repair and maintenance.
The Fix It Yourself RV Maintenance Course is the perfect way to learn how to do the most common repairs and maintenance on your RV. A Certified RV Technician wrote and filmed the course so you know the information is actually correct.
Plus it’s downloadable so you can access it from anywhere, even when boondocking in the middle of nowhere with no service.
Find out more about the best RV Maintenance and Repair Course available!